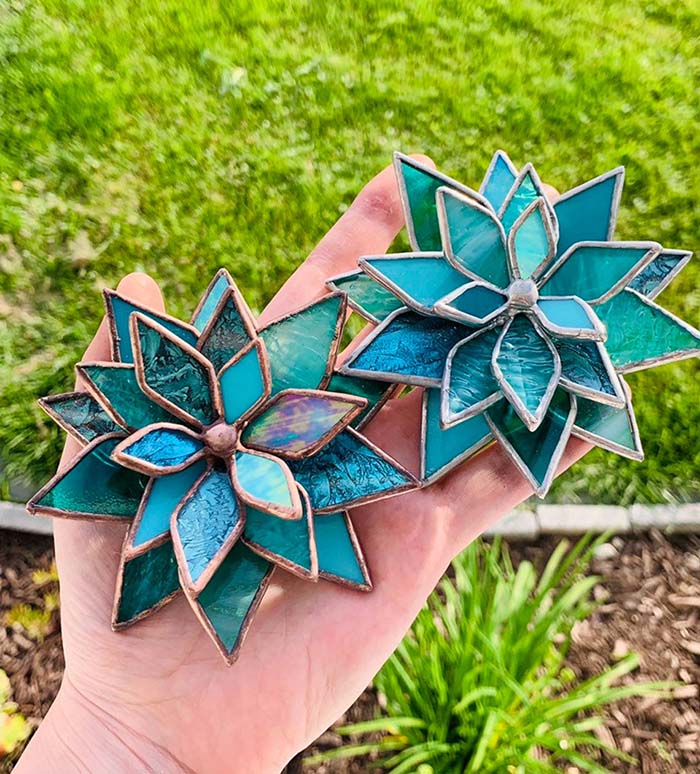
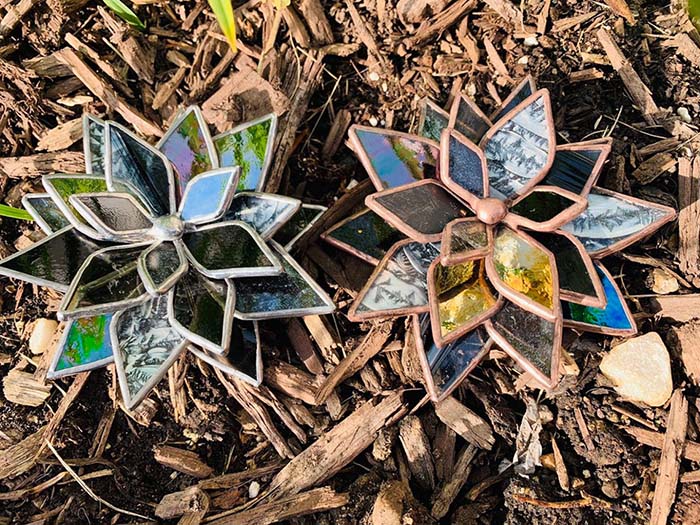
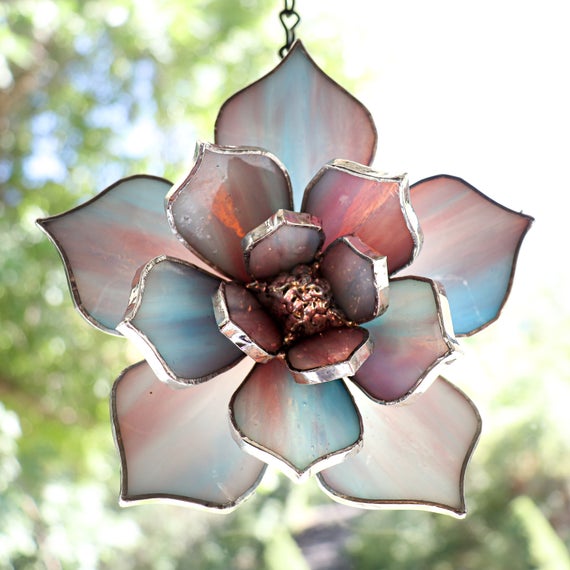
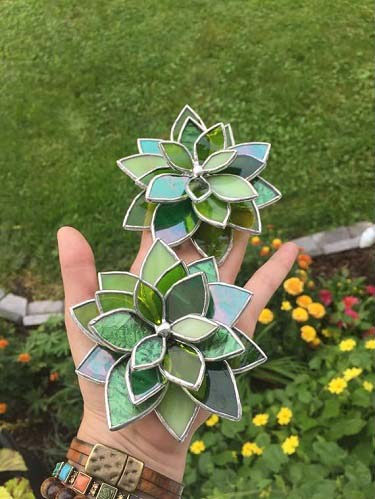
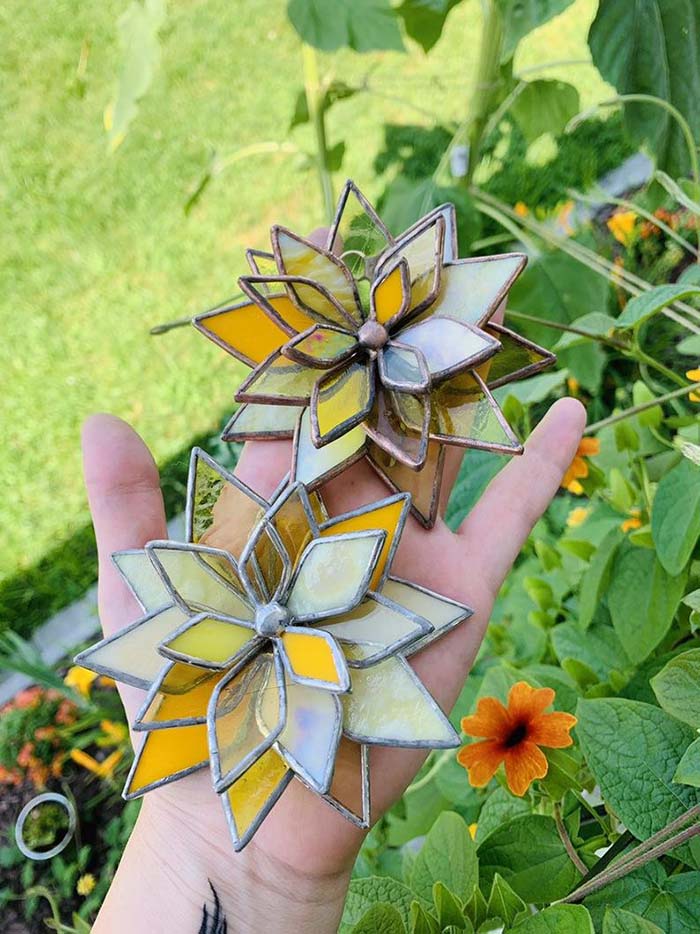
When I saw it the first word that came to my mind was “a masterpiece”! These stained glass succulents are so realistic!
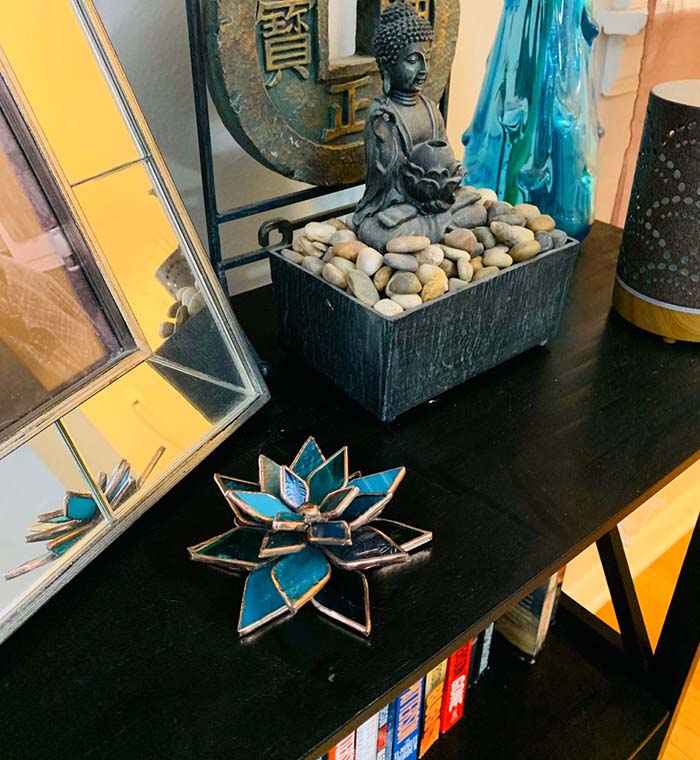
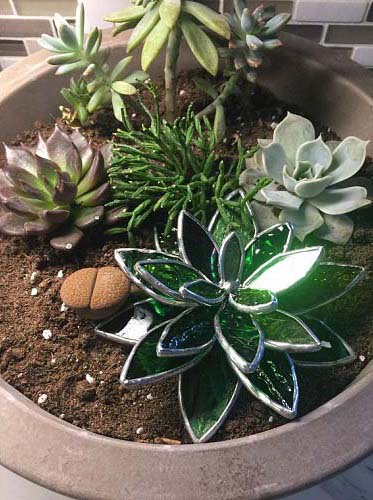
Put them next to real succulents in your garden or as a decoration in your home. You can have them equipped with a metal ring so you can easily attach them to a wall or a window. The result will be stunning!
You can find ready to buy products here.

The succulents are handmade from patina, solder, stained glass and copper foil. The manufacturer offers colors and sizes of buyer’s choice.
They can be a mix of opaque and translucent glass, Van Gogh, iridescent and different textured glass.
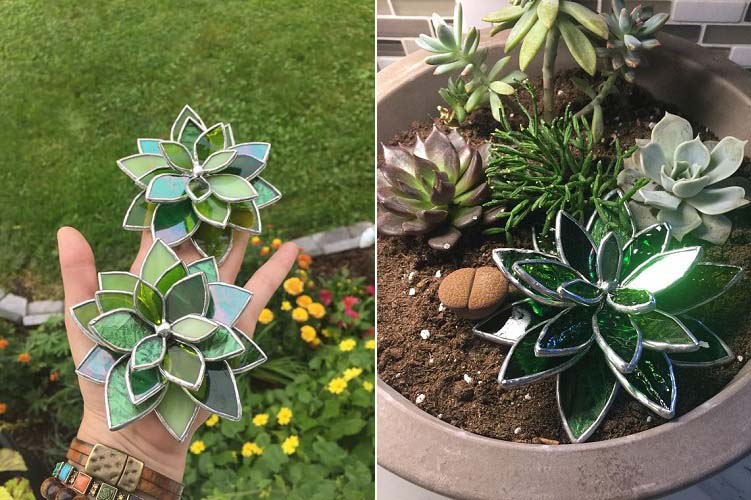
You can choose from pink, green, yellow, purple, blue, aqua, black and red colors. All of the customers are very impressed and eager to buy more.
If you prefer to save some bucks and you are anyway looking for a project to spend your spare time for, you can consider doing them yourself.
It is not as hard as it may seem at first glance but you definitely need to be handy and patient.
If you are a beginner in stained glass creations, we suggest that you pick up an easy project that doesn’t have too many parts.
How To DIY Stained Glass Succulents
What you are going to need as materials and equipment is:
- Stained glass
- Pattern
- Glass cutter
- Pliers
- Copper foil
- Soldering iron and solder
- Grinder
And here are the detailed instructions:
Step 1
Choose an easy project, a window panel for example.
Step 2
Select a pattern. When you are choosing a pattern you need to think about the following – how many pieces the pattern needs, how much cutting and soldering you are going to do.
Free patterns can be found on the Internet and at craft stores. Another option is to create your own pattern –a flower, a butterfly or a honeycomb could be great beginners’ projects.
Step 3
Choose the type of glass you are going to use for your project. The sheet glass can be Cathedral or Opalescent. Consider also its texture, color, transparency and price when choosing. You can find it at a craft shop or a specialized stained glass shop.
Step 4
While you are at the craft or stained glass shop, don’t forget to get a toolset as per the list above. We suggest that you buy a hand cutter as it provides flexibility and accuracy when cutting the glass. You also need a special pair of pliers that is intended for glass breaking.
Copper foil is used to attach the glass pieces together using its adhesive side. It is offered in various widths. You need to bear in mind that the backing on the Cathedral glass (clear glass) will be visible so you need to use foil of the right color.
Soldering iron and solder – make sure you pick up the right ones. The higher the tin content is, the more quickly it will flow and will leave a more silvery finish. The soldering iron needs to be designed for stained glass usage. Grinder – it is cheapest and easiest to get sandpaper or a Carborundum stone for the edges of the cut glass.
Step 5
Now you have got all the materials you need. Prepare your pattern by drawing, copying or printing it out of the desired size on a paper/cardboard. Cut separately all its parts; label and number them by color and grain direction. Clean your glass with alcohol and allow it to dry.
Put the pattern on a flat surface. Place the glass over the pattern and start outlining the shape with a permanent marker. Allow a maximum of 1 centimeter for the copper foil line which will attach the pieces together.
Step 6
Trace the outline on the glass with the cutter. In order to make it properly and at once, you need to hold the glass cutter between your thumb and your forefinger with the tip pressed between your forefinger and your middle finger. Press the cutter into the glass gently. Start from the furthest point direction inwards. If you hear a clear sound of cutting, then you are using the cutter just right.
Step 7
After you have traced the outline with the cutter it is time to actually break the glass. Here you need the pair of pliers. Place them in the crack, squeeze and separate the pieces. You can also do that manually by holding the glass on both sides of the break and then snapping it. These two methods are useful for straight lines. For curved lines and sections use the glass cutter to make a break through the line.
Step 8
Start grinding the edges of your glass pieces. Grind all sharp parts so that they are smooth. If you do not have an electrical grinder, use a Carborundum stone or plain sandpaper.
Step 9
Place all pieces over the pattern in order to check if all glass pieces are okay. They have to follow the pattern lines and fit well together. If you are happy with the alignment and the appearance of your pieces you can start attaching the pieces together.
Step 10
Place copper foil on the glass edges. It has to be well centered on each edge. Decide what the thickness of the foil will be. Then peel off the backing of the foil. Align your glass centered on the tape then press it along all edges. Press the foil with a firm instrument in order to achieve a strong bond between the adhesive back of the foil and the glass.
Step 11
Add flux to the foil which will ensure a smooth flow of the solder between the pieces. You can choose between a gel and a liquid flux. Remember to brush each copper-foiled surface with the flux before you solder.
Step 12
Remember our advice for patience? You will need loads of it for the next instructions. It is time to solder the glass pieces. First, tack together your pieces by applying small dots of flux to the glass and melting a very small blob on the solder’s top. Then start tinning the seams – this means to add flux to all seams.
Apply a thin amount of solder to them. Make sure you have covered all of the copper foil. Now you have to lay a new layer of flux over the tinned seams. Melt a larger amount of solder onto the seams. Run the iron back and forth until you create a melted solder seam. Once the seam section is melted, lift up the iron. This is the bead you have made.
Step 13
If you would like to frame your glass project, you can do it now using zinc or lead channel frame. It is made by soldering following the steps above.
Step 14
Visually check your glass piece. If there are any gaps you can fill them with copper solder.
Your stained glass creation is ready. Display it at your window or at a shelf and observe especially when the sunlight comes through. It took a lot of efforts but it was worthy, wasn’t it?
See more at Michaelines Design