You must be used to seeing tons of plastic pumpkin buckets in the stores at that time of the year. Probably you have half a dozen in your garage from last year.
If you have decided to change this year’s Halloween decoration, twink twice before you throw the plastic pumpkins away as we came across a brilliant idea for you.
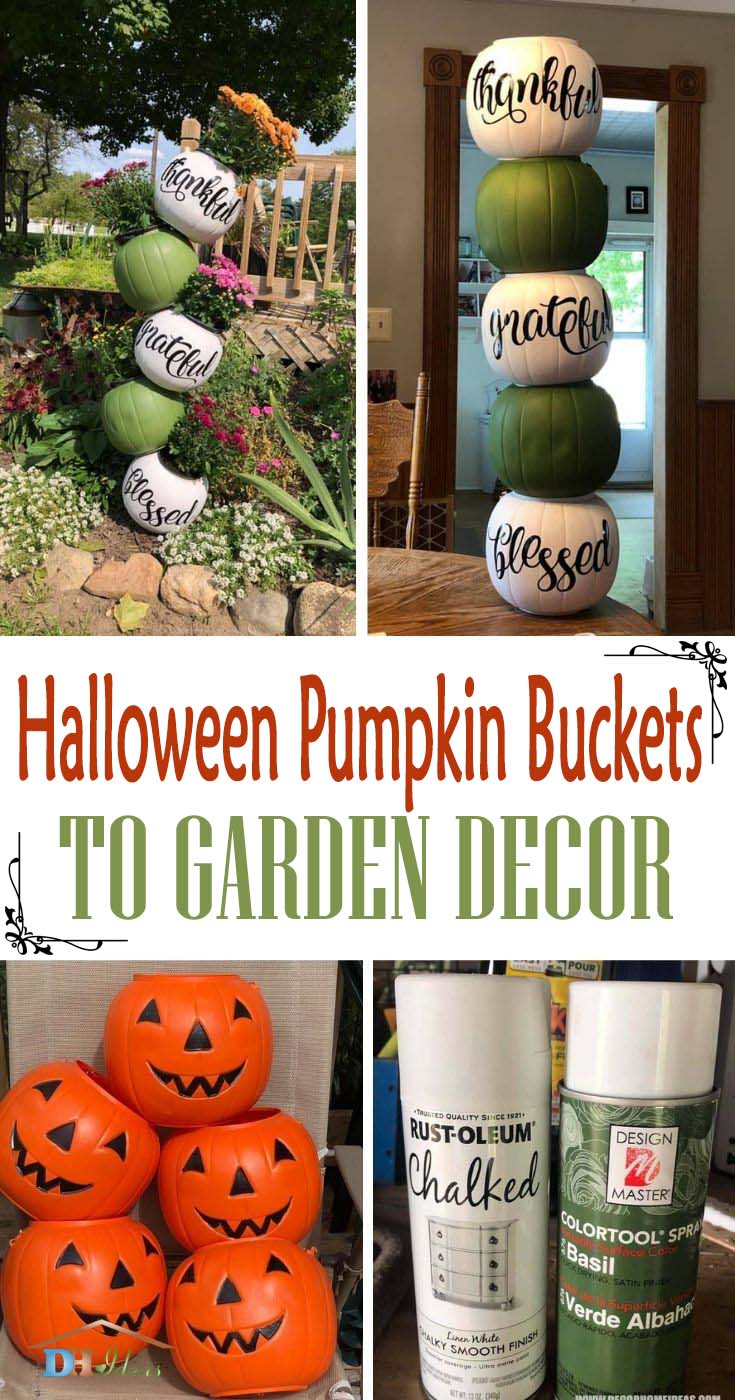
Maureen Ann Teramino from Michigan has found a way to upcycle her kids’ old pumpkin Halloween buckets. This farmhouse project transforms those orange smiling buckets into a remarkable and meaningful garden planter.
A full tutorial on how to make yourself this planter follows. You are free to change the colors and the inscriptions per your taste but in case you are happy with the original project, the sources of the supplies are listed for your convenience.
Supplies Needed:
- Halloween Pumpkin Buckets – Get them HERE
- Rustoleum Chalk Paint – Get it HERE
- Design Master Spray – Get it HERE
- Thankful, Grateful, Blessed Vinyl Decals – Get them HERE

If you don’t want to wait for delivery, these happy pumpkins can also be found at Walmart.
Get 5 pieces and get ready for painting. It is best to go out at the backyard where spraying will be safer.
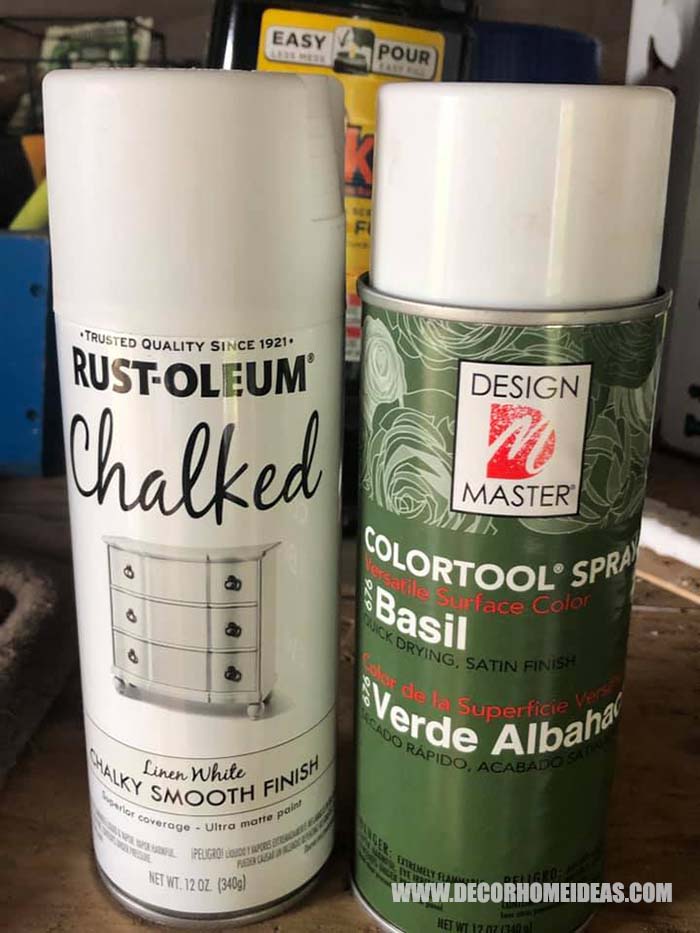
The chosen colors for the buckets are white Rustoleum chalk paint and green Design Master spray paint.
Both behave very well with plastic and succeed in forming a thick mat coat.
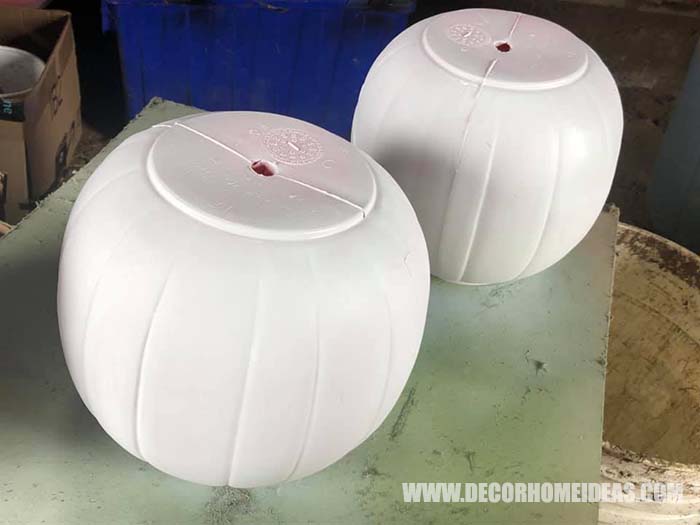
Spay 3 buckets with the white paint. They will be the ones with the inscriptions.
The other two cover with the basil green color. Let the coats dry according to the manufacturers’ instructions.
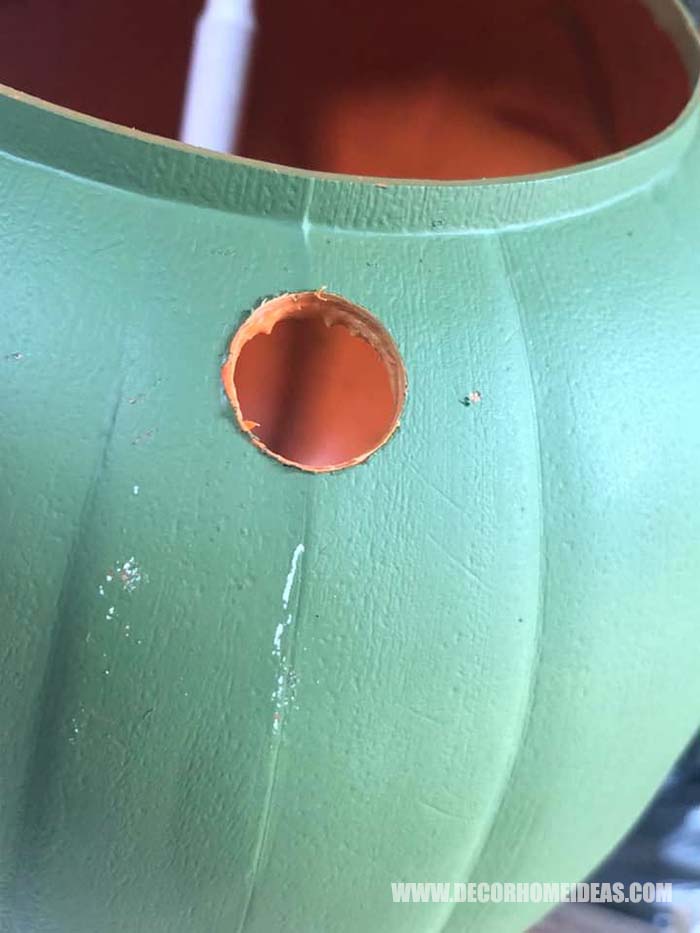
When your buckets are repainted and dry, it is time to prepare them for their new application as flower pots.
Since they will be staggered inclined on rebar, two holes must be preliminary drilled on each.
One hole in the center of the bottom and one hole aside and below the top opening.
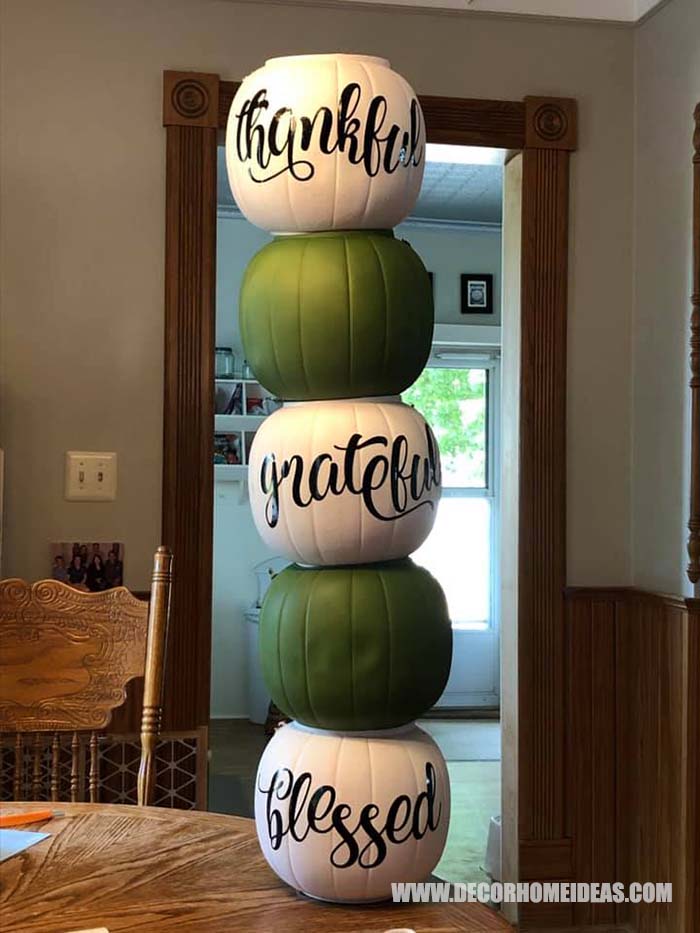
If you have a Cricut machine, the next step can also be done at home. The letters have been cut out of vinyl.
The width of those in the photos is 10 inches. In case you can’t cut the inscriptions yourself, you can always purchase them from Etsy.
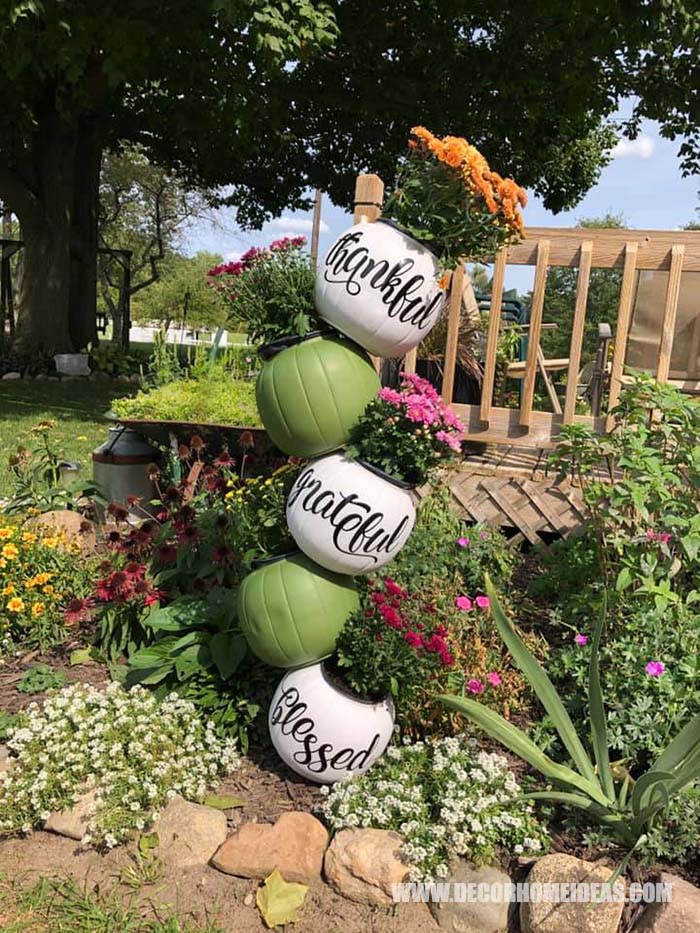
Once ready with your upcycled pots, it is time to take them to the garden. Figure out the place they will be staggered and fix the rebar securely into the ground. Insert the first white pot.
You can plant the flowers in advance or do it after positioning on the rebar. Continue staggering by alternating white with green buckets.
Voila! Making this planter is very quick, easy and affordable! We promise that it will quickly become the focal point of your garden as it is quite tall and of unusual design.
We can’t wait to see how you did your pumpkin bucket garden planter!