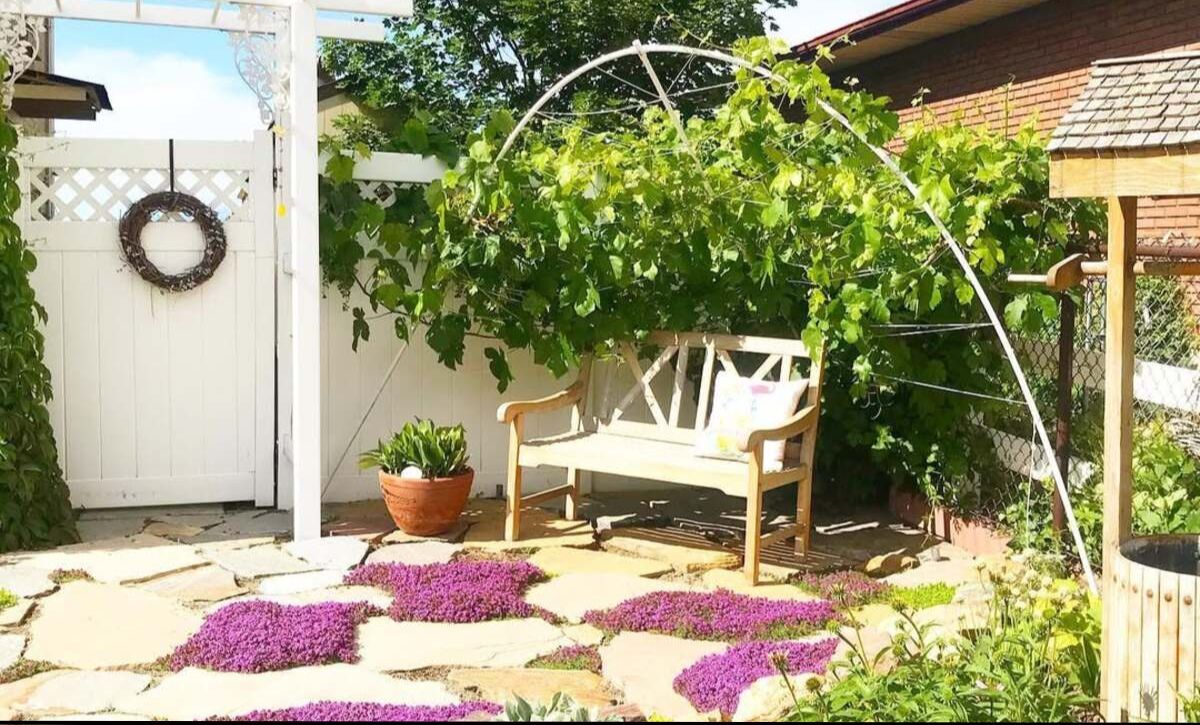
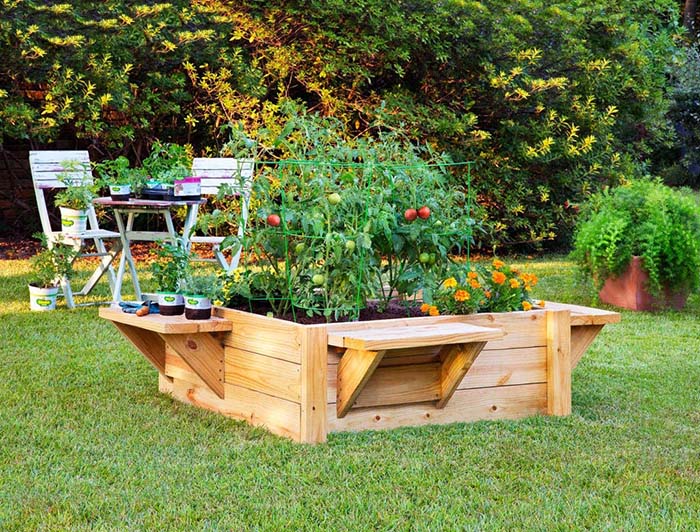
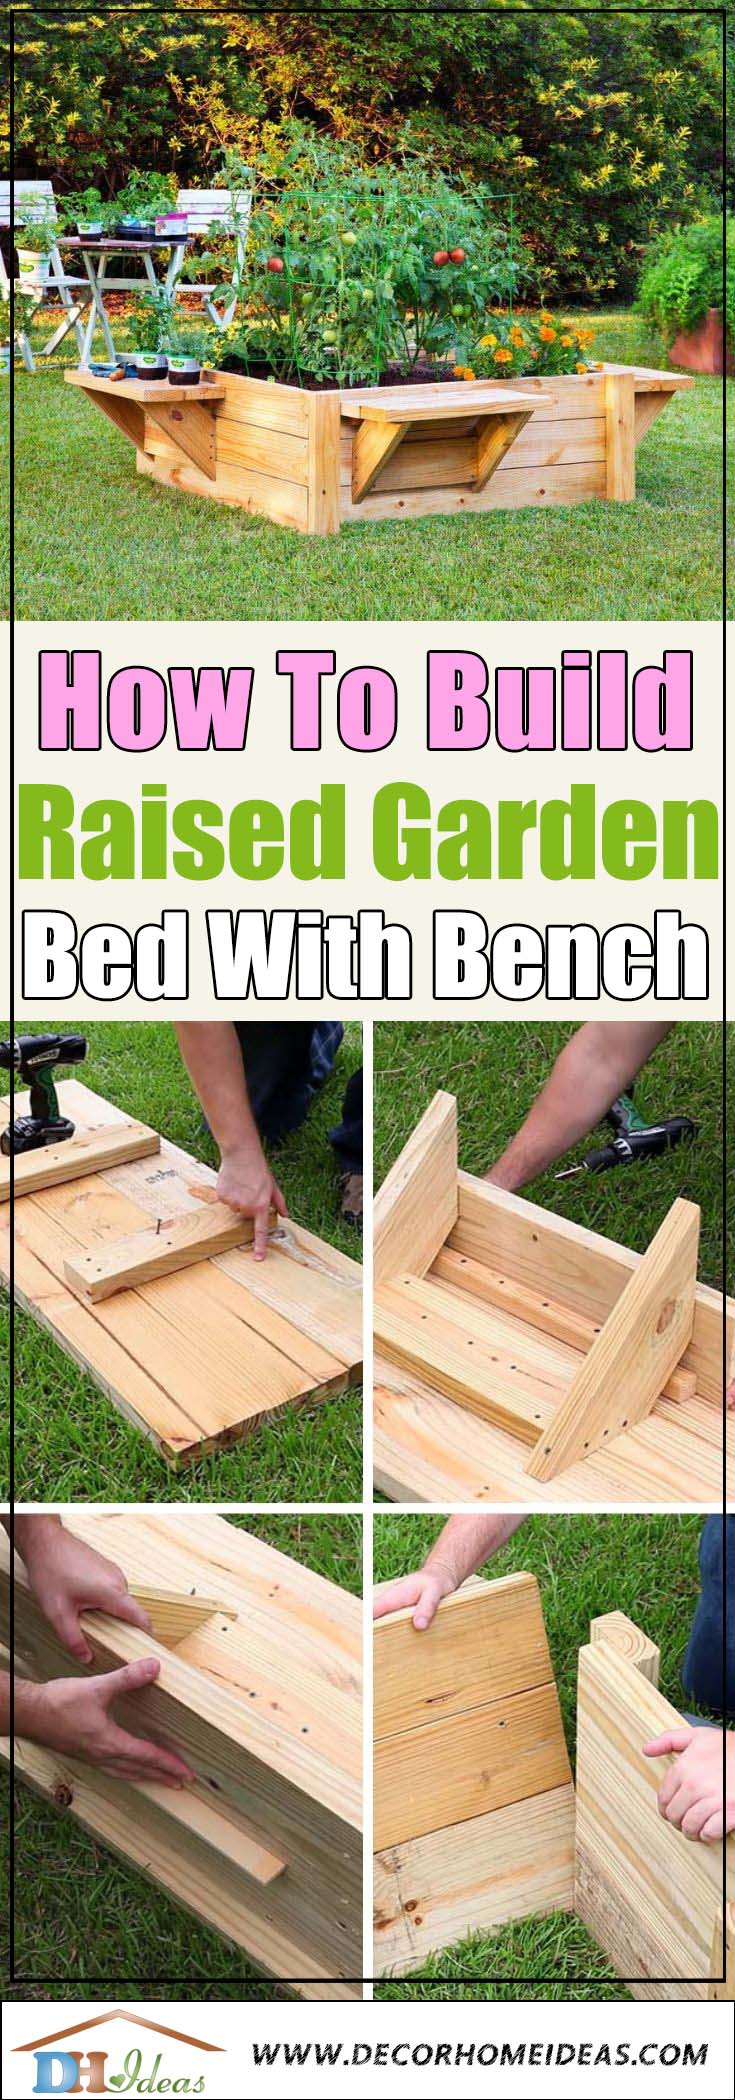
Homeowners looking for a comfortable way to garden will want to consider the benefits of building a raised garden bed with a bench.
This makes it easy for gardeners to reach their garden when harvesting, weeding, and planting, without having to bend and contort the body uncomfortably to reach the food.
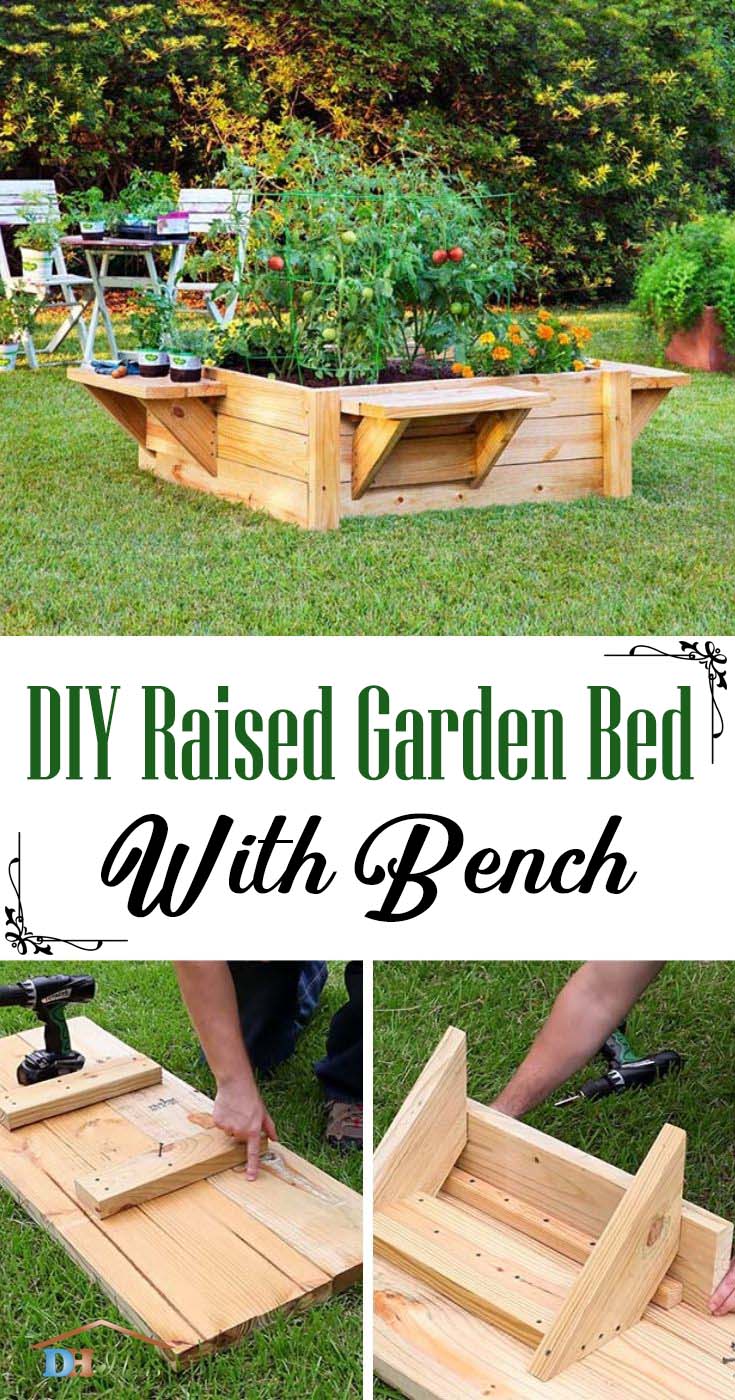
Don’t forget to PIN this image for quick access to the instructions.
While a raised garden bed with bench seating is a great option for any gardener, they are especially useful for anyone who suffers from knee, back, or hip pain.
You can plant some small flowers garden or grow vegetables.
If you prefer to watch video, scroll down to the end of this post.
Gather Materials
The first step in building a DIY raised garden bed with bench is to make sure to take the time to gather all of the materials.
Having the right materials on hand not only makes it easier to complete this project in a timely manner, but also prevents additional trips to the store throughout the day, which can be very frustrating.
The materials needed are:
- 1 lb of 3” deck screws
- 3 lbs of 2.5” deck screws
- 2 – 2 x 8 x 8 boards
- 8 – 2 x 6 x 8 boards
- 3 – 2 x 4 x 8 boards
- 2 x 2 x 8 board
- Measuring tape
- Square
- Clamps
- Drill/driver
- Circular saw ( Mitter saw )
Cut and Prepare the Materials
Some homeowners may want to simply have their boards cut for them at the big box store where they purchased them, as this can make it much faster and speed up the actual building process of this project.
Builders who want to complete every part of their raised garden bed with built in bench, however, can easily cut the wood on their own and prepare their materials.
The parts that will need to be cut are:
- 4 seat cleats – 1.5 x 1.5 x 20.5
- 4 outer posts – 1.5 x 3.5 x 16.5
- 4 bracket supports – 1.5 x 5.5 x 16
- 4 bottom side slates – 1.5 x 7.25 x 45
- 8 side slates – 1.5 x 5.5 x 45
- 8 inner posts – 1.5 x 3.5 x 14
- 8 brackets – 1.5 x 5.5 x 15.5
- 8 seat slats – 1.5 x 1.5 x 20.5
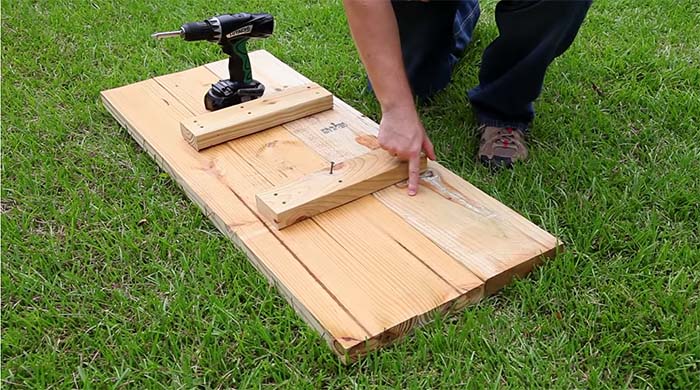
Made the Side Assemblies
Once all of the parts have been cut, then it’s easy to create the side assemblies.
Using one bottom slat and two side slats, place two inner posts in from the ends and attack with 2.5” screws.
This needs to be repeated until there are four assemblies made.
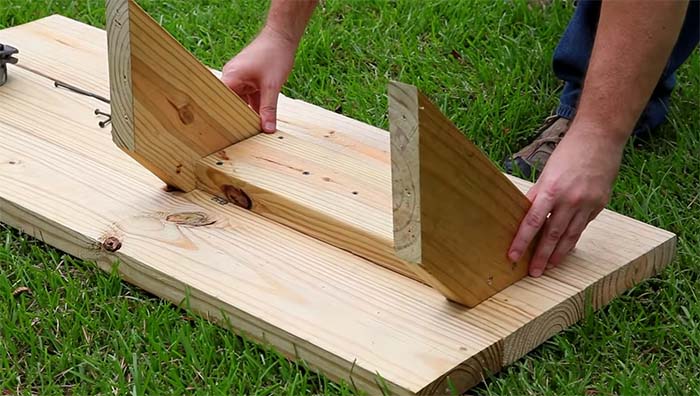
Using a pair of side assemblies, attach a bracket support with 2.5” screws.
The bracket can then be attached, as long as the ends are flush with the bracket support. Using 2.5” screws, attach these to ensure that they won’t wobble.
From the opposite side of these assemblies, use 2.5” screws to secure through the side slats and into the brackets.
Repeat this with the second set of assemblies and then attach outer posts to this set with 2.5” screws.
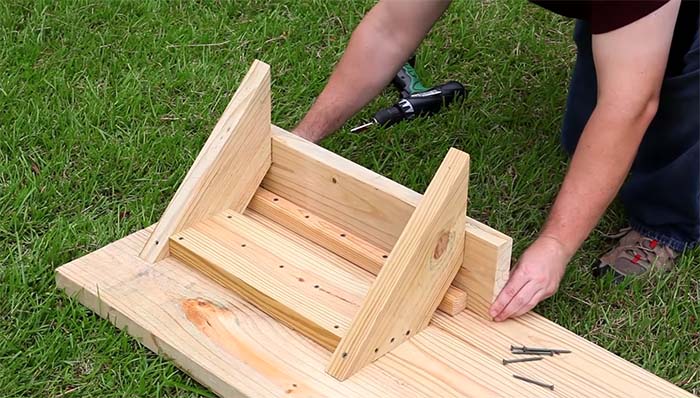
Add Seat Slats
Using the seat assemblies that don’t have outer posts, add a seat slat on each, tight up to the brackets and end of the side slat.
Mark this line and then attach a seat cleat here with 2.5” screws. Then attach a seat slat to the cleat the bracket using additional 2.5” screws.
Carefully position another seat slat on the assembly and use 2.5” screws to attach it to the brackets.
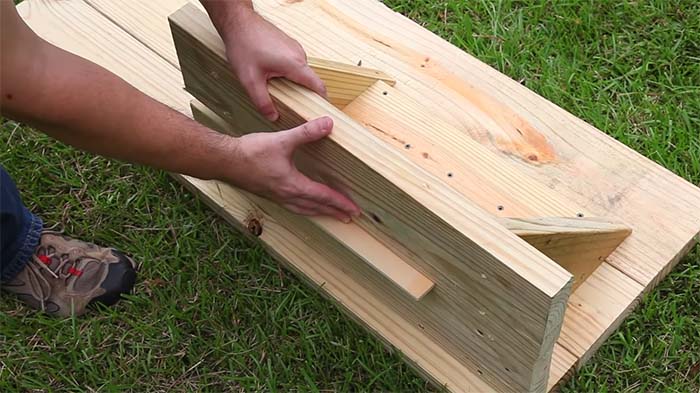
Now take the seat assemblies with outer posts and attach seat slats against the brackets and side slats, using 2.5” screws.
Adding two seat slats to the seat cleat using 2.5” screws will help to add even more stability at this point.
Attach the Side Assemblies
Using a side assembly that has an outer post and one that does not, put them together at a 90-degree angle and fit the side slats up against the outer posts. Use 3” screws to attach them firmly.
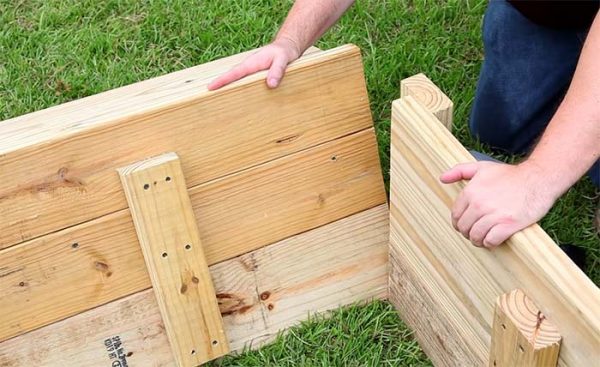
Repeat this with the other pair of side assemblies. These will form the corners of the raised garden bed with bench.
Carefully position the pairs of side assemblies together, taking time to push the side slats flush up against the outer posts so that there won’t be any gaps. Attach them with 3” screws.
The corners all need to be flush, and at this time the garden bed shouldn’t wiggle. Any wiggling or movement needs to be taken care of with additional 3” screws.
Fill and Use
After using these raised garden bed with bench plans, it’s important to fill the raised garden with high-quality soil.
Using a barrier, such as a weed barrier or old newspapers, on the ground before filling the garden bed with soil will help to keep weeds from growing in the garden.
Anyone who wants to know how to build a raised garden bed with a bench can easily follow this guide, as it was designed to make it easy for any homeowner to complete this task.
By pre-cutting all of the wood and making sure to have all necessary materials on hand, homeowners can plan to easily complete this task in as little as four hours, allowing them to have a great raised garden bed in the yard for this summer’s garden.
Here is a step-by-step video tutorial for detailed instructions: