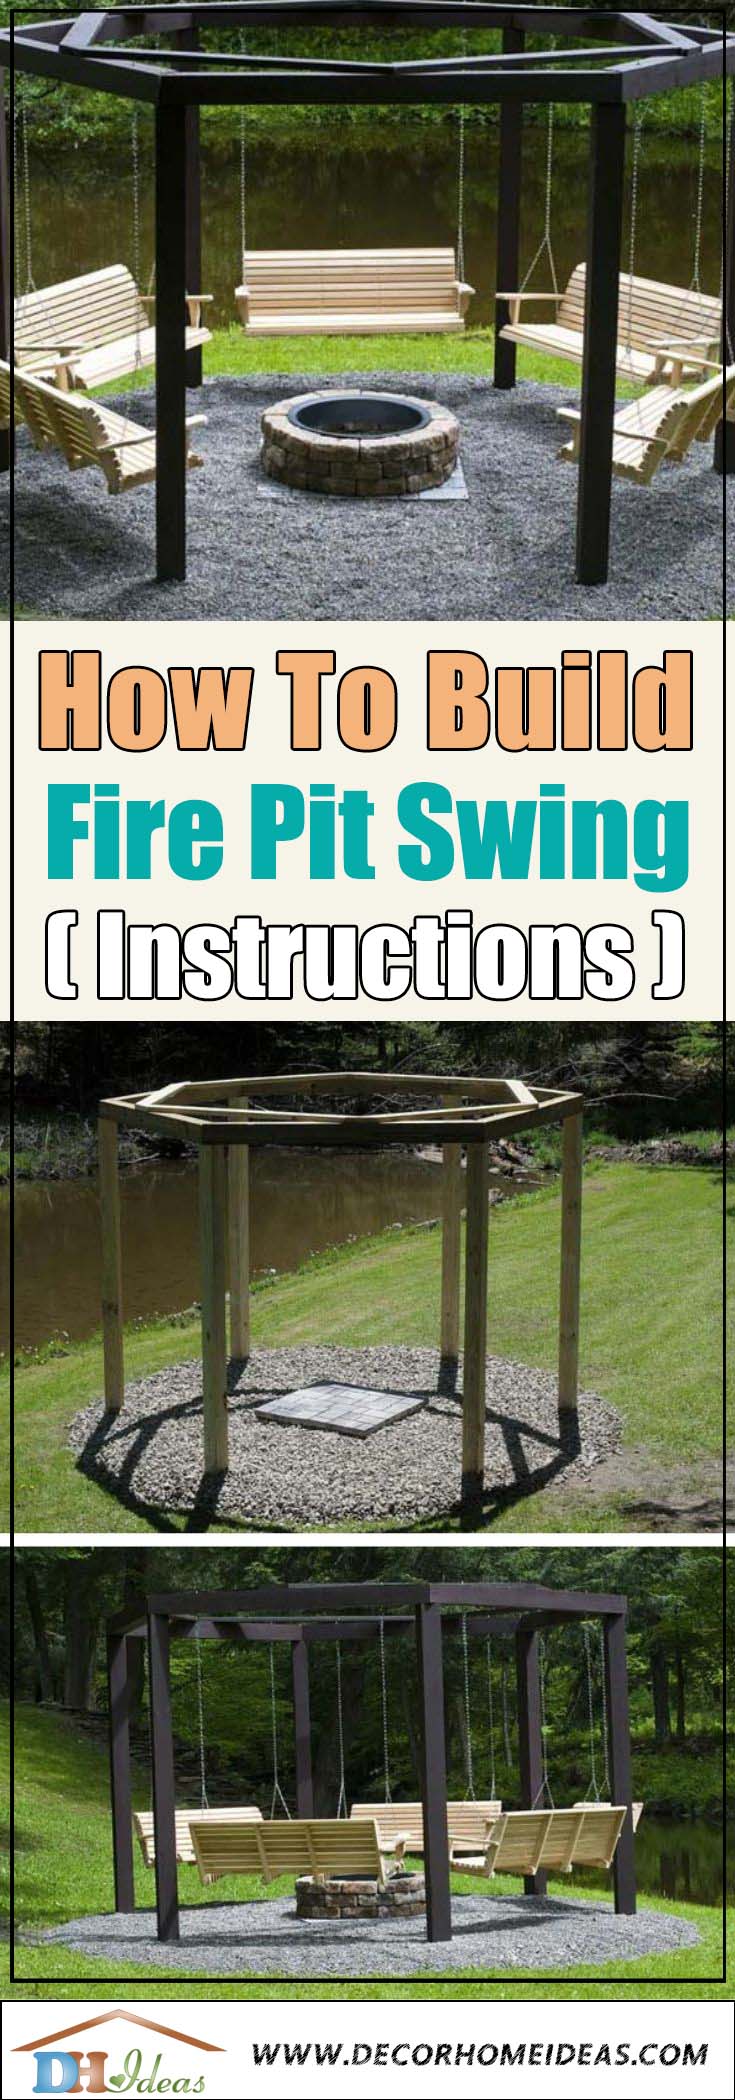
Building your own fire pit swing might look as a difficult task, but with these simple instructions and blueprints anyone can do it.
But first, let me ask you something:
What’s better than sitting around a fire pit and drinking beer?
I tell you what!
Swinging around the campfire having a chat with a glass of wine or should I say – tea?
This project would take around 3-4 days to complete so plan ahead your time.
Before we start with the step by step tutorial, let’s see a list of the materials needed:
Supplies:
- 6 – Bags of Sacreete (or Quickcreete – whatever you call it) one for each upright.
- 6 – 6x6x10’s (for the uprights)
- 6 – 6x6x8’s for the top sections
- 6 – 2x6x8’s for the stabilizers that go kitty corner on top of 6×6’s (for strength)
- 24 – 3/8’s x 8″ lags for laggin the top horizontal pieces to the uprights (countersunk)
- 24 – 4″ Deck screws for screwing the top pieces together horizontally before lagging them.
- 24 – 3″ Deck screws for screwing the top 2×6 stabilizers to the 6×6’s
- 10 – 3/8×8″ eyebolts with nuts and washers for hanging the swings
- 5 – Swings
- 10 – Swing hangers
Tools:
- A couple of A-frame ladders
- Power miter saw
- Shovel
- Sledge hammer to drive stakes into the ground
- Post/Line level
- Tape measure
- Drill and bits for the deck screws
- Stain and brushes for the stain
When you have piled all your materials and tools, you are ready to start your hexagon fire pit with swings ( you can build octagon or bigger one if you think this one is too small ).
First thing is to find an area that is big enough for the structure. It would be nice if it’s leveled, so that you won’t need to level it by yourself.
The diameter of the fire pit swing structure is approximately 14 ft. so you will need at least 20 ft. across.
As it has a fire pit in the center you need to be sure that there are no trees close to the fire and no branches are above it.
Even though having some trees around is a good idea as they will provide shade in the summer and during the day when the pit is not firing. Just be sure they are not very close to the fire.
The hardest part is to dig the six holes at the correct places and with at least three feet depth.
You can start with building the top hexagon with beams and then use it as a template for the holes.
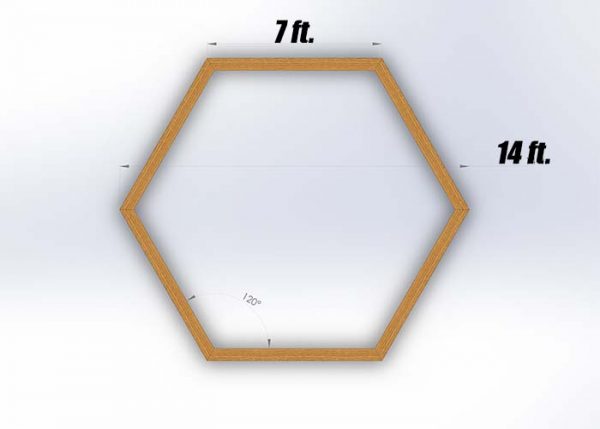
Or you can use some geometry like this guy did:
Here is how to lay out for the upright posts. If you want to use the dimensions provided, locate where you want the fire pit.
Drive a stake in the ground in the center of the pit location. Get a piece of light rope and make a loop in one end big enough to slide over the stake. Make a mark at 7 feet.
Get a squeeze bottle of chalk dust, the kind used in a string marker, and make a circle where the posts will go. Determine where you want your first post to go.
Mark the spot on the circle and drive a stake. Put the loop of the rope on that stake. Stretch out the rope and find the 7 foot mark again. Where that mark crosses the chalk circle is where the next post goes. Drive a stake in that spot.
Continue around the circle until you have a stake where each of the six upright posts will be. This is an old lesson from high school geometry class.
When you are ready with the holes, the marking for each post should be exactly the same distance from the center and exactly the same distance apart. Please do check this before continuing.
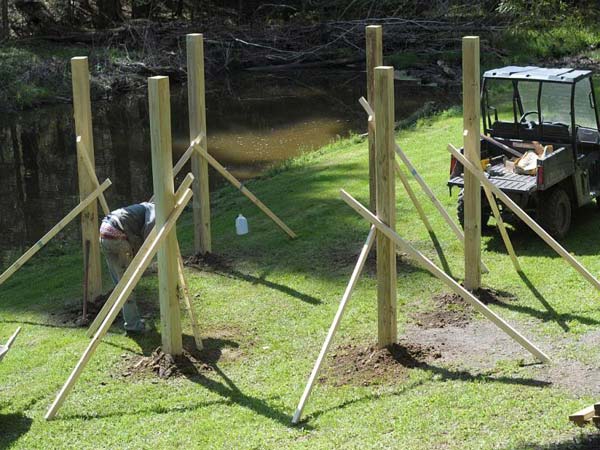
When you put the posts in the ground, be sure they are leveled and upright. You can just cut the top off to make each one at the same height.
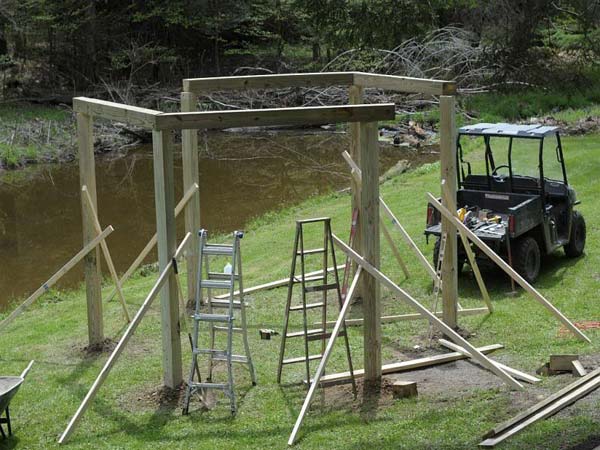
You can now attach the top hexagon shaped beams to hold the structure in it’s perfect position.
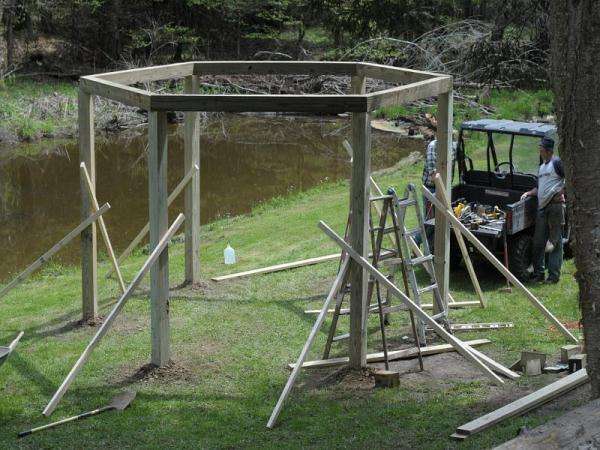
Once the concrete is dry, you can take down the braces and the cheater beams. You can congratulate yourself for the hardest part is completed.
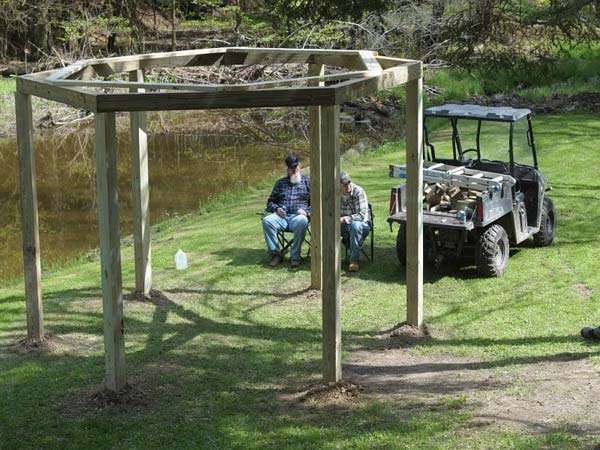
Next step is to add the cross beams ( stabilizers ).
Set each 2×6 board so that it lays over the center line on two beams.
The cut on the board should match the center line on the beam.
You need tocut each board one at a time and then place them on the structure to make sure they fit properly.
You will also want to trim the outside edge of each board so it does not poke over the beam.
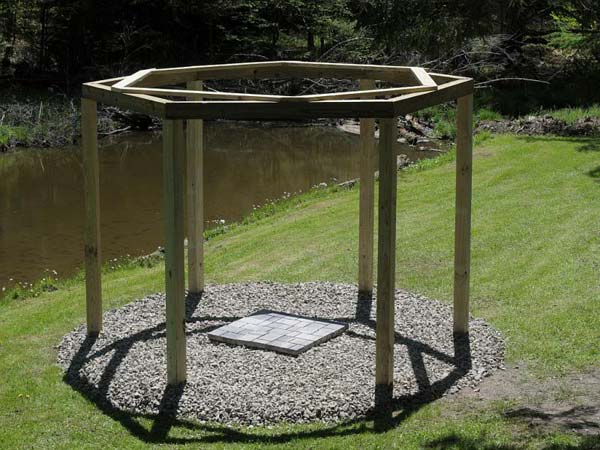
Now you can put the foundation for the fire pit and spread some gravel or pebbles and level them. You can choose whatever tiles you like for under the fire pit.
We have some great DIY fire pit ideas to try or you can buy one from a local home and garden retailer.
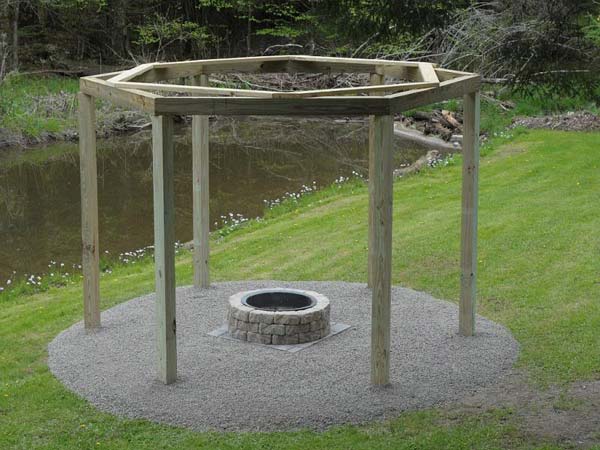
This is how it should look with the ground leveled and fire pit installed.
Now that the structure is assembled and firmly grounded, it is time to stain. You could choose any colored stain as per taste.
Let the stain drain off and start installing the swings. It’s not that hard. You need to drill holes for the swing hooks to be hanged on the beams.
Measure the distance between the chains and then find the center of the beam between any two posts.
From the center measure half the distance on each side of the beam. It’s the only way to be sure that the exact in-between chains distance is mapped out on the beam.
These 5′ benches are from Louisiana Cypress Swings and Things are easy to assemble.
Use the through bolts to attach the swing hooks.
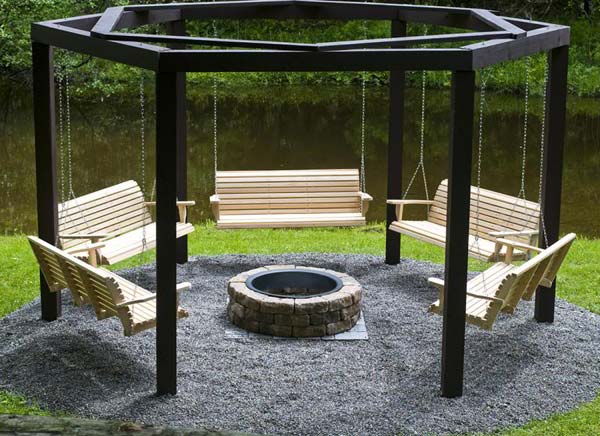
This is the final result and it looks awesome.
A guy who already have a similar fire pit with benches points a negative side of the project:
This project has the same problem that almost every fire pit setup I have ever seen online and in reality. The distance between the seating and the fire isn’t variable. The size of and heat produced by every fire varies dramatically and of course changes depending on the state of the fire.
Even if every fire you set produced the exact same temperature the ambient temperature changes with the seasons, plus people find different temperatures comfortable, therefore it is of paramount importance that the seating be capable of being moved closer to or further from the fire.
I have a fire pit and my visitors’ seating positions vary a lot. Depending on the multiple factors I mentioned. If you build a pit like the one shown it might look great but you will end up rarely using it or having only some of your guests want to sit at it.
Big thanks to Dave Chenango from bowhunting.com who shared this project with all the DIY-ers all over the world.
Would you like to DIY? Let us know in the comments.