Homeowners, and even professional installers, are sometimes tempted to use caulk as a quick fix for an uneven flooring gap between the baseboard and the floor, but this often looks unsightly.
A better idea is to install quarter-round or shoe molding to give the room a more professional and polished appearance.
This solution is especially effective in conjunction with hardwood floors since it can help make the transition between wall and floor look seamless.
Additionally, selecting a color that matches or complements the baseboard creates a unified look throughout the room.
What Is Shoe Molding
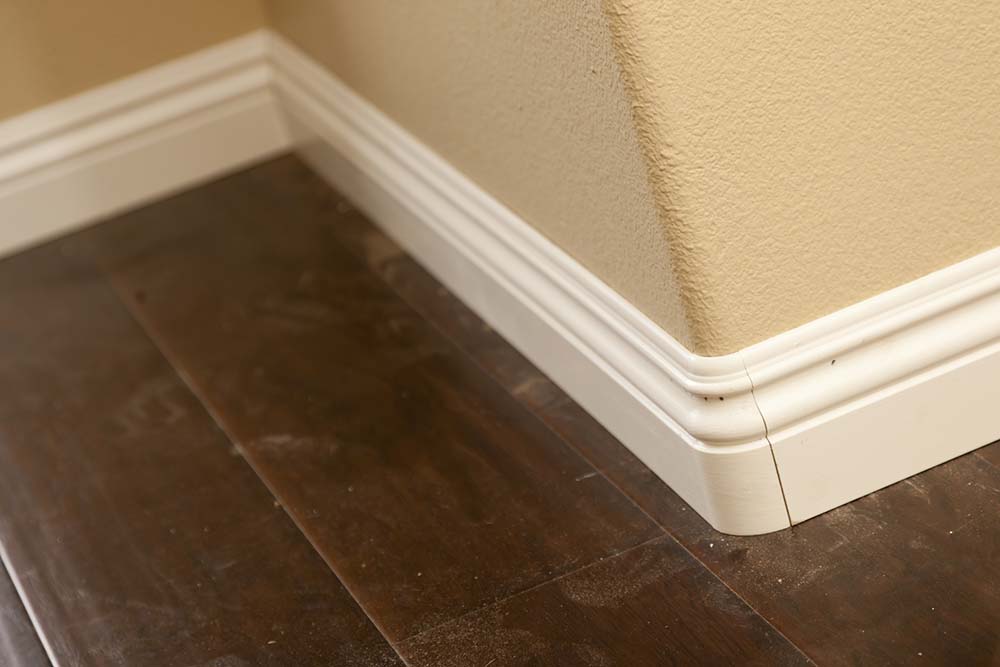
A staple in many homes, shoe molding (also referred to as base shoe molding) is the thin strip of wood that runs along the base of your walls and door frames.
Installing shoe molding around a door frame is a great way to add character to any room, and it’s usually a DIY project. This article will examine various shoe molding types and how to end shoe molding at the door frame.
Types of Shoe Molding
1. Wood Molding
Wood shoe moldings come in unfinished hardwoods such as oak, maple, mahogany, birch, and walnut. These solid hardwood pieces can be stained or painted to coordinate with any floor color desired.
Painting is often the more affordable when attempting to match existing floors isn’t necessary.
Staining the wood provides a richer hue that brings out the wood’s natural grain while also allowing it to blend into its surroundings.
Professionals recommend sealing wood moldings with a clear coat finish after staining or painting to help protect them from moisture damage and prevent warping and cracking over time.
While wood shoe molding is an aesthetically pleasing choice for baseboard trim, it can easily chip away due to impacts from furniture and foot traffic, so consider selecting harder timber like oak or walnut when possible.
2. Chair Rail Molding
Chair rail shoe molding is a popular accent piece to enhance walls and cabinets. It typically has three distinct profile options – square, rounded, or half-round – that can be customized to fit different sizes and requirements.
Depending on the desired look, it can have a width of 1/8-inch to 3-inch and come in multiple lengths.
This molding allows you to create unique designs with intricate patterns and finishes that complement your home decor. It is also a great way to add interest and texture to any room, whether an interior wall or kitchen cabinetry.
3. Crown Molding
Crown molding is an interior decorating feature that provides a distinctive finish to different elements in the home, such as walls and ceilings adjacent to one another, cabinetry, bookshelves, armoires, and even the fireplace mantel.
It comes in various styles and designs, from basic trim options to elaborately ornamental designs that allow for a more sophisticated look.
By installing crown molding where the walls and ceiling meet, you can create a visually appealing transition between the two surfaces while also elevating your overall interior design scheme.
Additionally, it also serves to emphasize any architectural features present throughout your home.
4. Cornice Molding
Cornice molding is a superb option for adding a decorative touch to the top of walls and other surfaces.
It can be installed on interior and exterior spaces, providing visual interest and often echoing classic architectural designs. In interior design, you can cut cornice moldings to custom lengths to fit specific locations and be designed with ornate detailing, or choose from great classic patterns ready-made from vendors.
Either way, it’s an excellent way to create a level of sophistication that elevates any room, no matter the style or setting.
Quarter Round Vs. Shoe Molding
Quarter-round molding is a type of trim that is a quarter of a full circle when viewed from the end. It has two flat faces of the same width, and its length protrudes from the wall equalling its height.
Compared to shoe molding, quarter-round molding is more rounded, with its protrusions offering less floor space and giving off a more finished look due to appearing like it hugs the baseboard.
However, shoe molding is usually preferred by trim carpenters and homeowners as it has a sleeker design than its curved counterpart, being taller and narrower. This means it can be installed along the bottom of the baseboard while leaving more room for other items or appliances.
Tips When Installing Shoe Molding
Before starting any project involving chair rail shoe molding, you must adhere to the manufacturer’s specifications for proper installation.
Generally, this entails installing the baseboard and attaching the molding by nailing it. However, when utilizing lengthy pieces of chair rail, using wood glue as an adhesive is recommended to secure them firmly.
Use the Right Tools
The first step in installing shoe molding is gathering all the necessary supplies. The most important items are;
- Wood glue
- Miter saw and miter box
- Coping saw
- Nails
- Base molding
- Paint, stain, or varnish
- Pencil
- Brad nailer
- Wood putty
- Hammer
- Nail set
You’ll also want to wear safety goggles and gloves throughout the process. Once you have everything ready, you’re ready to get started.
Start in a Corner
When installing shoe molding in a room, start in any corner and work your way around in one direction. Before installing shoe molding, it is essential to prepare the area by laying down newspapers, cardboard, or plastic sheets to protect the floor.

Additionally, it is essential to find a well-ventilated room; open all windows and leave the room while allowing the paint to dry.
To ensure that no one else steps inside, it would be beneficial to ensure everyone in the house is aware of the project. It is best practice when nailing on shoe molding to go with the grain of the wood so that it does not split and become damaged.
Secure the Shoe Molding with Nails
Place one finishing nail approximately every 12 inches along the baseboard, making sure not to insert them into any gaps beneath the baseboard.
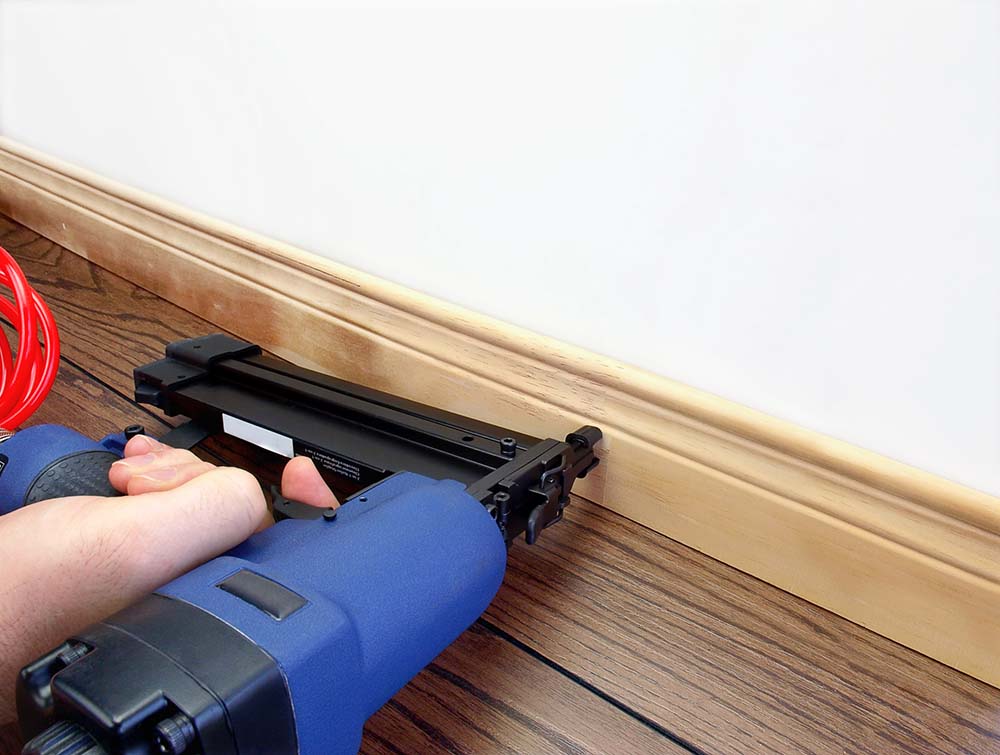
Using a pneumatic brad nailer is an easy, one-handed way to put nails in the baseboard. It eliminates the tedious job of manually hammering each nail head into place with a hammer. It would be best if you used a piece of wood to block your hand from the nail gun and ensure safety.
Some heads can remain slightly above the trim’s surface even when setting the nails at the correct depth. Hammering down these protruding heads can cause damage to the trim, so a better solution is to use a nail set and gently tap on the heads until they are just below the surface.
If there are any gaps between pieces of molding due to irregular corners or nail holes, you can use a putty knife to fill them with matching wood putty or caulk if it has been painted.
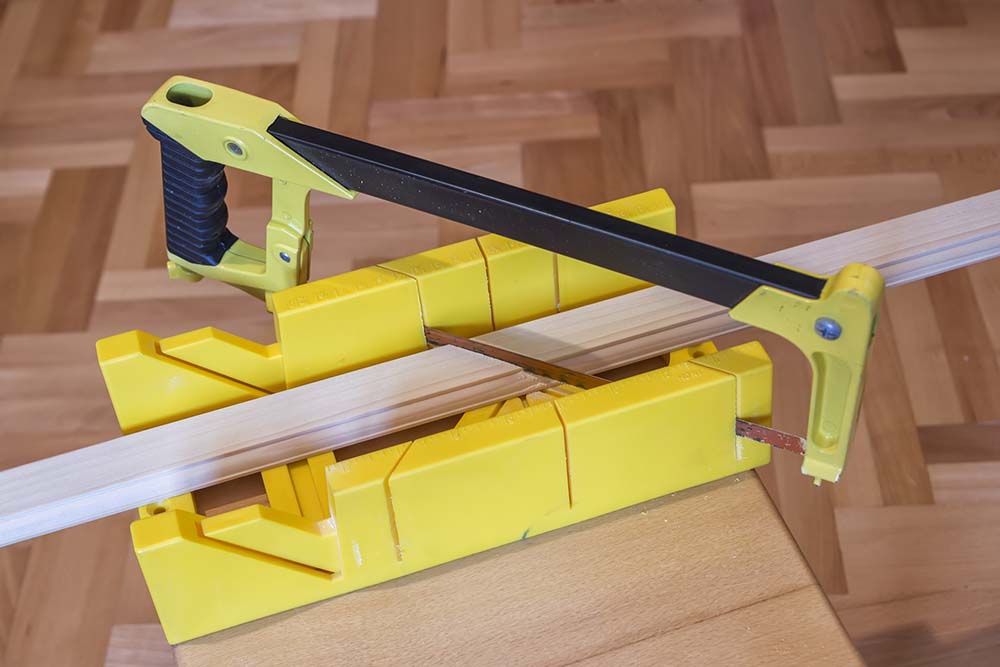
Miter Outside Corners
When constructing a corner with a baseboard, it is essential to properly miter the ends of the two pieces so they can fit together snugly.
The best way to do this is by cutting each end at a 45-degree angle, enabling them to form a perfect corner when joined. To ensure that the molding remains securely in place and the corner well sealed, applying a small amount of construction glue on each end is crucial before nailing it down.
This additional adhesive is an extra safeguard and counteracts any potential movement or loose joints.
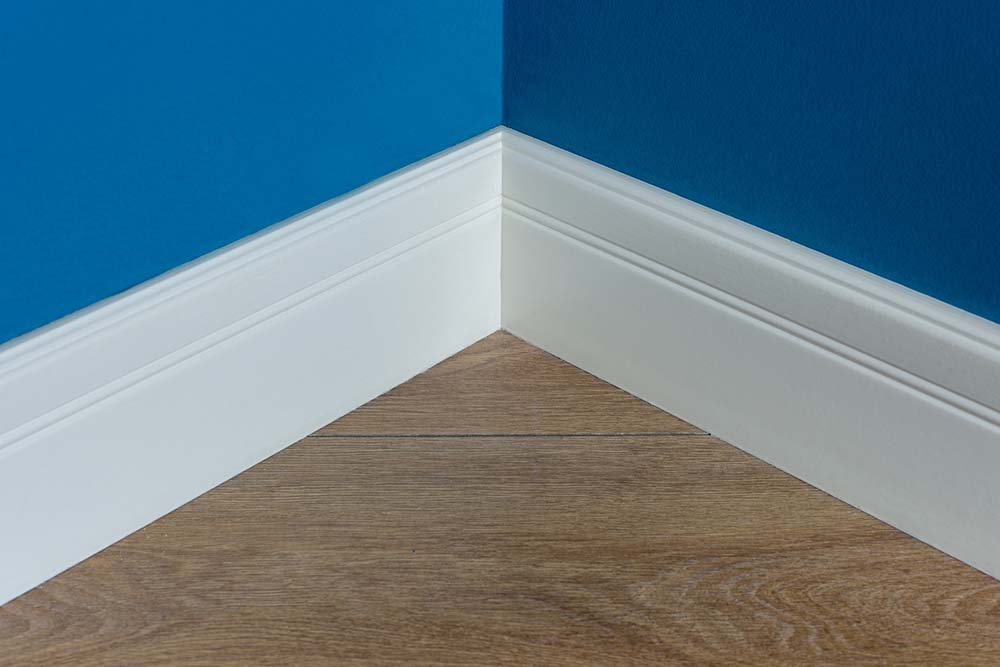
Cope Inside Corners
Utilizing a miter joint for the inside corners of a room may not produce the ideal result, as it often can leave behind a gap in the corner.
A much better solution is opting for a cope joint, sometimes referred to as back beveled. This method requires cutting one of the trim pieces at a ninety-degree angle and fastening it so that it sits snugly in the corner.
The second piece is then cut to forty-five degrees, and material from behind the edge of the cut is removed using a coping saw.
By doing this, you can overlap this piece onto the first without having any gaps appear between them. It’s vital to have precise measurements and cuts to ensure success when implementing this joinery technique.
How to End Shoe Molding at Door Frame
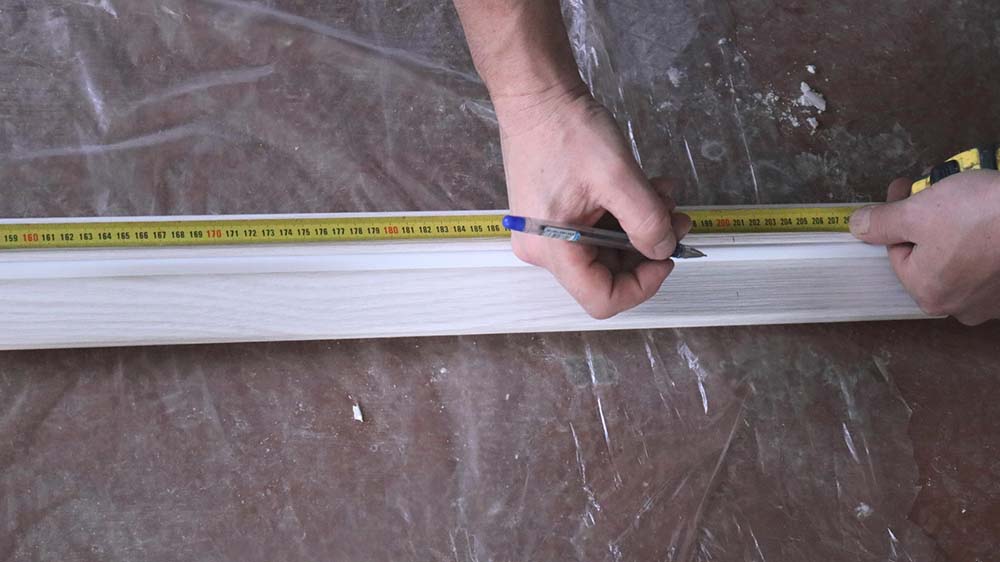
You will need to measure the width of the wall just above the floor level and cut pieces of shoe molding that will fit into this space.

It is vital to ensure that all pieces are cut to the same length to fit perfectly in place and create a seamless look. It is necessary to cut the end of the molding at an angle that meets the door casing.
You can use an angle smaller than 45 degrees for a smoother transition or make an inside cut of 45 degrees to create an overhanging edge when installed.
The next step is to take the pieces and attach them securely to the baseboards on either side of the door frame. To do this, use small nails or screws to attach the shoe molding.
Once secured, use a putty knife or other tool to spread construction adhesive along the back side of each strip before pressing it firmly against the wall.
Take care not to leave gaps between each piece when installing, as this may lead to warping or cracking over time.
When attaching shoe molding around door frames, it is essential to consider how it will intersect with other trim types, such as crown moldings or chair rails.
It would help if you always ensured that each piece fits tightly together without any noticeable gaps or uneven edges. If inconsistencies exist, fill them with caulk before painting or staining your trim pieces for a cohesive look.
While one option for ending shoe molding at door frames is simply cutting off each piece where it meets the plinth block, another option is creating curved mitered corner joints where both pieces meet.
This might require additional measuring and cutting but can be done with a miter saw set at very shallow angles for precision cuts.
After cutting both pieces into curved shapes, secure them with more nails or screws and fill any gaps with construction adhesive and caulk before painting or staining your trim work for an elegant finish.