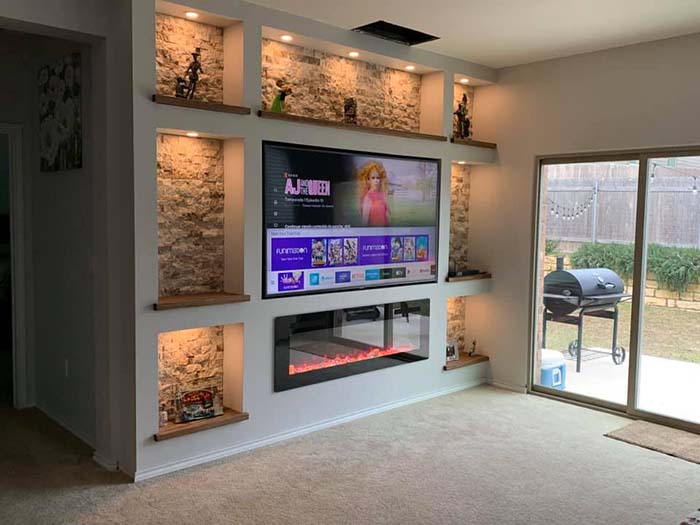
An impressively stylish and easy to DIY TV unit for your living room.
Here is an opportunity to show your DIY capabilities by creating a customized TV unit in your living room. Impressed by the simplicity of the project, its cost-effectiveness and the final WOW result, we are all convinced that this is a MUST project!
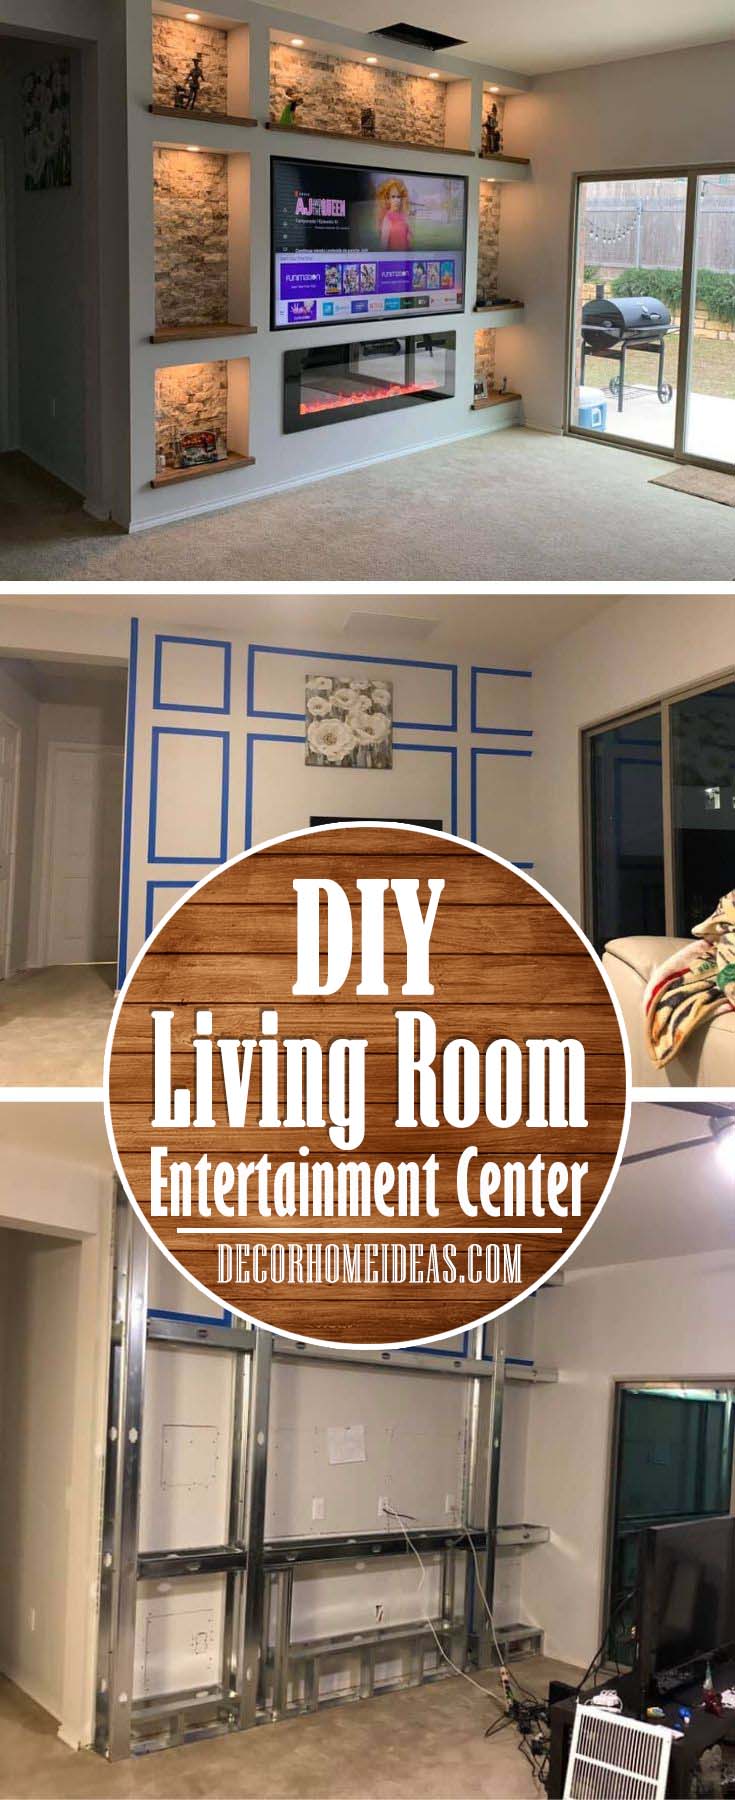
This awesome project was made by Alfonso A. and turns out incredible. It’s very popular among other drywall professionals and everyone who wants to make something similar in their living room.
Materials and Equipment:
- Wide non-transparent tape or marker&ruler
- Drywall sheets of appropriate thickness to withstand the weight relevant to the intended use
- Metal profiles
- Drywall corner beads
- Drywall mud
- Stone/brick panels – (or any other texture you like)
- Wood boards
- Appropriate substrate for installation of the stone/brick panels (it depends on the material the wall is made of, discuss with the store assistant for details)
- Cavity dowels
- Self-drill screws
- Drywall screws
- Paint
Tools:
- Metal cutting shears
- Electric screwdriver
- Hawk and a trowel
- Brush/Roller
Step by Step Instructions:
Step 1
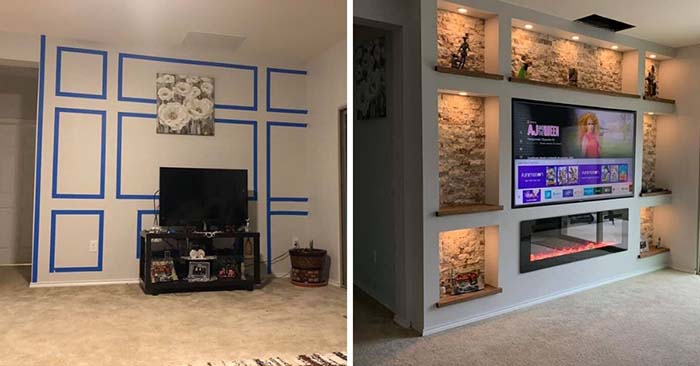
First, trace the outline of the TV unit on the wall. The open areas of the unit should be able to take up the TV and the fireplace.
Don’t forget to allow some additional space for the TV to cool – an inch all around should be sufficient. You can use a marker and a ruler to get straight lines or a tape.
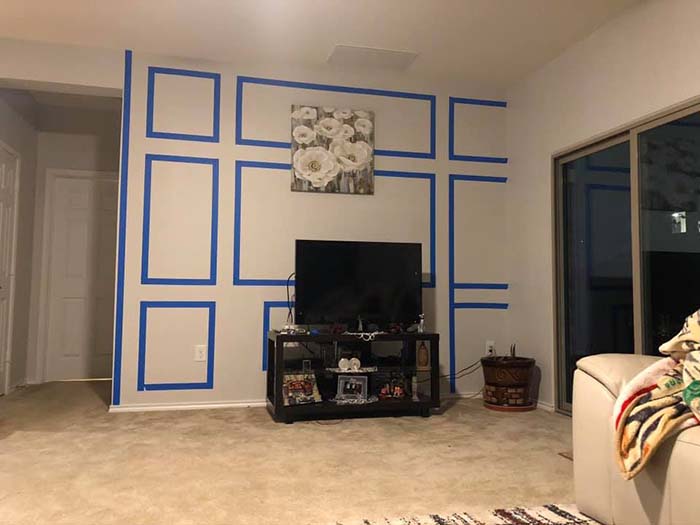
All necessary cable conduits and the cabling must be installed beforehand or at that step. Estimate how many devices you are going to plug in advance – for example, place to charge your phones, the TV, the fireplace, lights. It all must be prepared at that stage.
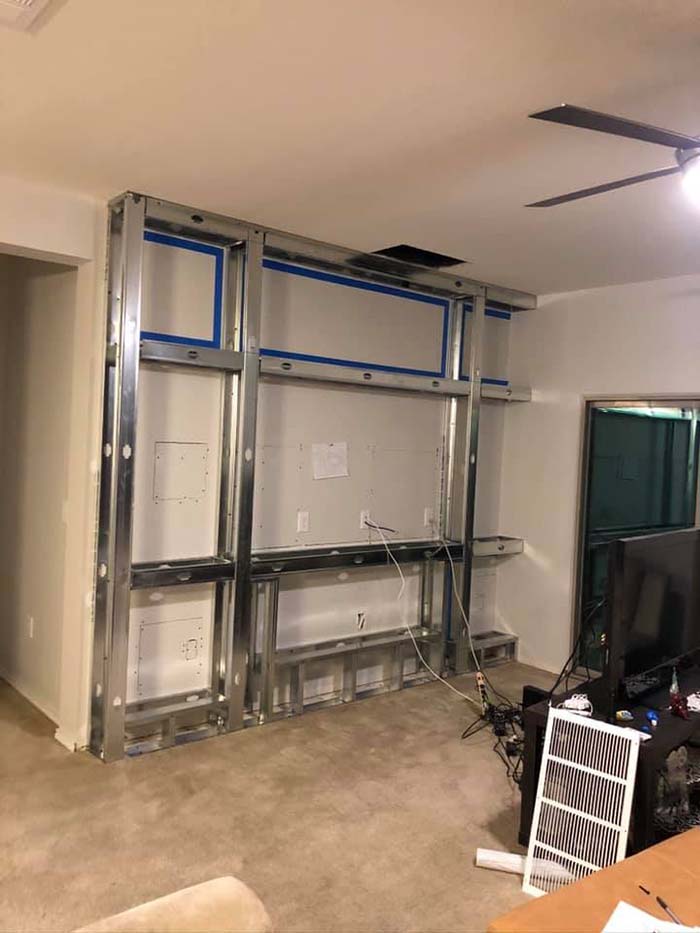
Step 2
Take your profiles and cut them at the length of each section. First, you shall fix the base profiles to the ceiling, to the wall and to the floor. For that purpose, you should use cavity dowels which will securely tighten them to the basis.
Then start assembling the other metallic profiles to the base ones building the metallic frame of the TV unit. Use self-drill screws to fix the metal profiles to each other.
Step 3
Start preparing the drywall panels. The defining rule for a successful construction is to cut the panels very precisely.
This will ensure that all parts fit well together – the panels to the frame structure and the panel-panel assy. It is highly important to consider the thickness of the panel and the studs’ width when sizing the panels prior to cutting.
Each drywall panel is fixed to the metal structure with drywall screws. Each screw head shall slightly kink the metal, leaving a small pressure in the drywall panel. Ensure all screw heads are slightly below the wall level.
Step 4
When you have finished the arrangement and securing of the drywall panels, start placing the drywall corner beads which will connect the side angles of the drywall structure. Each corner bead should be cut precisely at the exact length of each drywall angle assy.
They are fixed to the panels via drywall mud. Prepare the mud using the manufacturer’s instructions. Take your hawk and trowel and lay a fine layer of mud all along each side of the corner bead.
Take off the surplus mud using a broad knife or the hawk. Move the hawk along the mud layer at an angle while applying pressure enough to take out the excess.
Step 5
Allow the mud on the corner beads to cure. When it has dried you can start laying the final coat on the drywall panels. After the mud layer has cured sand the areas that need smoothing.
Step 6
It is time to install the stone or brick panels on the intended places on the wall. You should get all the needed materials that are appropriate for your wall in advance.
Tip: You can also use a faux brick wallpaper like this one:
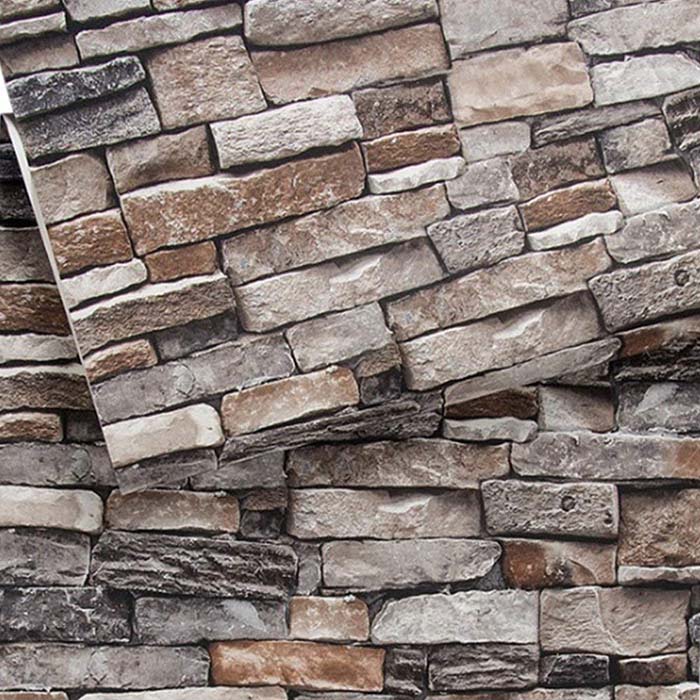
You can get one HERE.
The material your wall is made of (its finish) is the factor that defines the type of substrate which shall be used to create a good bond between the wall and the decorative panel.
You should discuss with the shop assistant what the best bonding materials for your particular case will be. Follow the installation instructions from the manufacturer regarding correct amounts of bonding materials, installation steps, time to cure etc.
Step 7
While waiting for the stone/brick panels to bond well with the wall, you can start painting the TV unit in the chosen color.
Step 8
After the paint has cured, you can place the wood boards. These are actually not functional in any way. They are used to give a more stylish design of the TV unit and to create a flow match between the used materials.
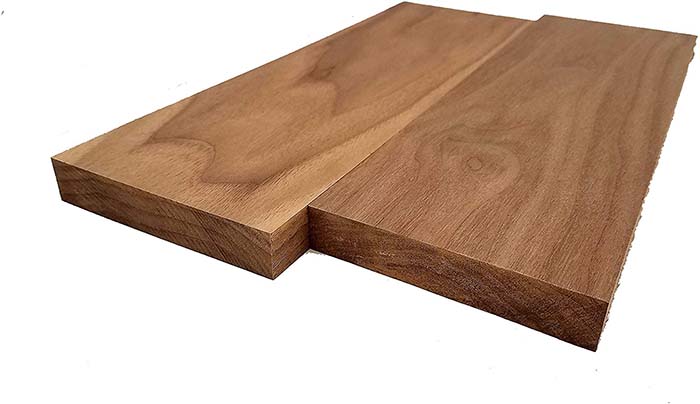
You can find this walnut lumber HERE
We recommend that these boards are bolted through the drywall panels rather than glued to them. Another idea is to leave them unfixed but you should mind the weight and size of the objects placed on them.
If left unbounded to the drywall panels, they should be used for light accessories with decorative purpose.
Step 9
We advised you to prepare all the cabling before starting to build your TV unit. Now that the structure is ready you can proceed with the lights, TV and fireplace installation.
Your unique and stylish TV unit has been completed! For sure it will be a catching-the-eye place from your home!