A do-it-yourself wooden sink is probably not the first thing that comes to mind when you’re planning a bathroom renovation. Can you really create your own wooden sink? With a few simple materials, you really can create a one-of-a-kind piece.
Take a look at the finished sink. The carving style looks like it was chiseled by hand. In fact, you’ll find this style of woodcraft sells for hundreds of dollars in high-end shops. We’re going to show you how to get this look without breaking the bank. When you’re finished, you’ll have a skill that you can apply to other projects. You can make great gifts or sell them as hand-crafted pieces.

We’re going to take you through the steps of how this unusual sink was created. It’s a little large for a home, but by following our simple guidelines, you can create something similar that would look great in a guest bathroom.
Tip: If you don’t have a lot of woodworking experience, a rectangular, shallow basin would be a good starting design. The basics of this project are simple enough, but getting the measurements right for fitting on a vanity can be tricky.
Materials
- Wood. Three pieces of reclaimed oak were used for this project. Another good choice is mahogany. Be sure all of the wood has dried properly.
- Broken Tiles. The number of tiles will depend on your basin’s design.
- Drain Body. This sink is designed for an external faucet and levers. A drain body should be chosen to match the diameter of your drain pipe.
- Heavy duty Multi Use Construction Adhesive – like this one
- Epoxy Resin – like this one
- Car Lacquer. You’ll find a choice between urethane and polyurethane. Polyurethane is more durable.
Tools
- Circular Saw
- Angle Grinder With Grinding Disc for Wood and a Grinding Disc for Tile.
- Belt Sander – this one is perfect
- Tile Nippers (optional).
- Drill with Forstner Bit.
- Aerator mask (used when applying car lacquer).
- Caulking Gun.
- Clamps.
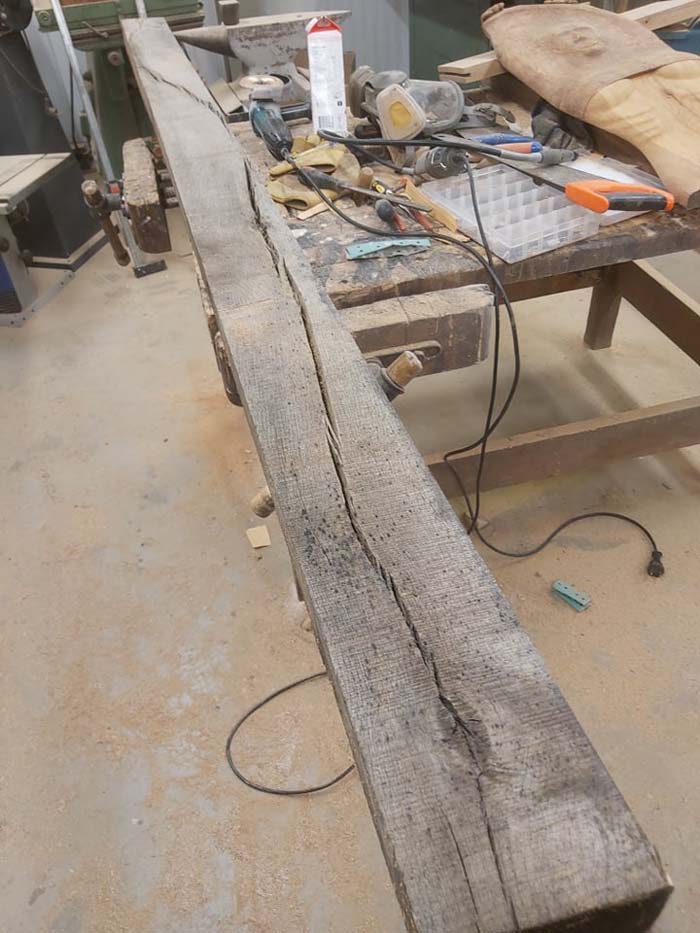
Plane Your Wood
The amount of wood is determined by the size of your vanity. Keeping it on the shallow side will make it easier to build the tile pattern.
Round bathroom basins have a diameter ranging from 16 to 20 inches.
The size of rectangular sinks runs from 16 to 23 inches front to back and 19 to 24 inches wide.
Since you’ll be gluing all the pieces together, you just need a rough match.
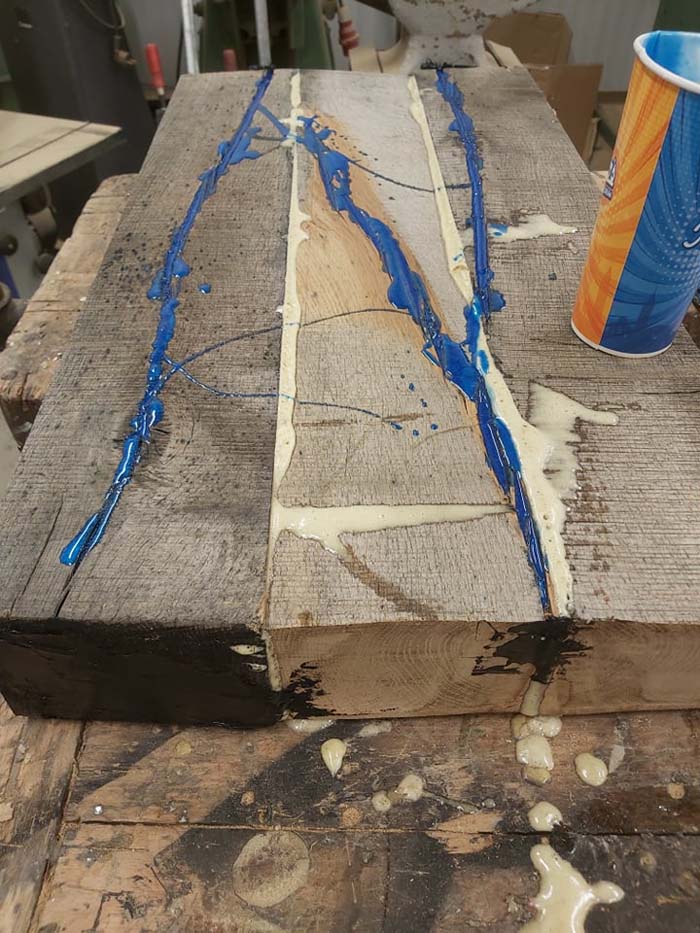
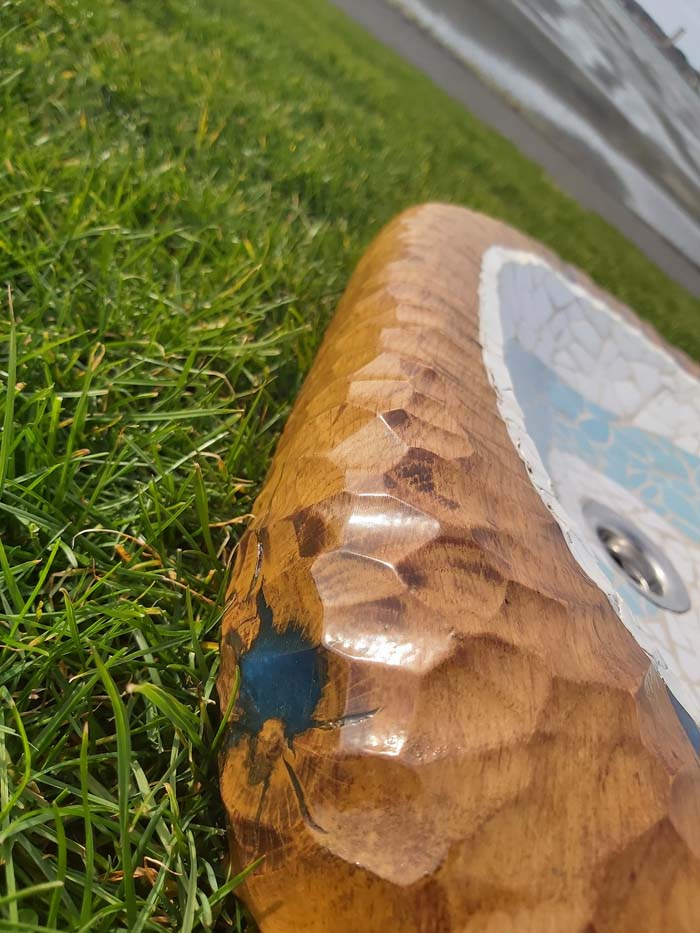
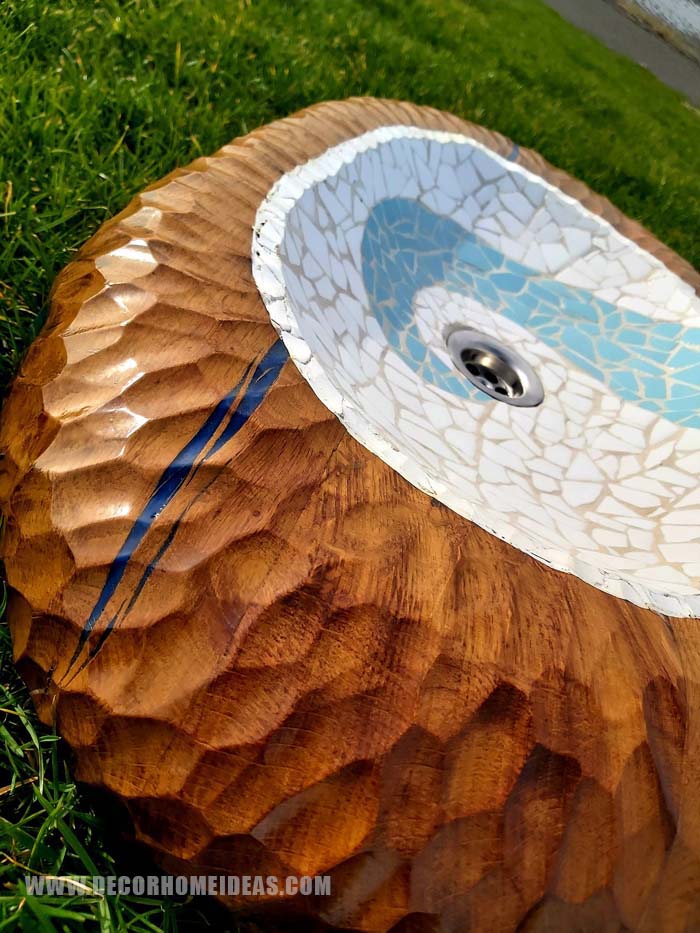
Fill Any Gaps in the Wood with Epoxy Resin
Epoxy resin is a strong bonding agent and will seal the imperfections in your wood pieces. The colorful blue river design never gets old. It looks contemporary and is an easier solution than trying to match a wood filler.
Let the resin cure before moving to the next step.
Glue Together Your Wood Pieces
Use the multi-purpose construction adhesive to bond the wood pieces.
Clamp together and let dry.
Saw a Basic Form
Save yourself a lot of time by using your circular saw to cut the basic form down to size. Make sure it will fit on your vanity. This is also a good time to ensure that the basin will fit underneath the faucet when it’s installed. If it’s too high, use a planer or band saw to lower the height.
Start Sanding
Keep sanding until the surface is fairly smooth. You’ll be chiseling off most of the surface area, so it doesn’t have to be perfect.
Sketch Your Design
Sketch an outline of the sink. Don’t forget to mark a drain hole. The measurements need to account for a faucet extending over the basin and the distance from the back wall.
Drill a Hole For the Drain
Using a drill with a Forstner bit, drill a hole for the drain body.
Rout Out the Basin
Use your angle grinder with the wood disc to get the job done. Do a little at a time, working to keep the depth level from side to side.
The depth of the sink shown is 5.9 inches. Most sink basins are 5 to 8 inches deep.
Carve the Outside Design
This high-end look was achieved using a belt sander. You might want to practice on scrap material while waiting for the pieces to dry and the epoxy to cure.
Use 400 grit sandpaper to smooth out the carvings by hand. Optionally, you can use a corner/detail sander.
Draw Your Mosaic Design
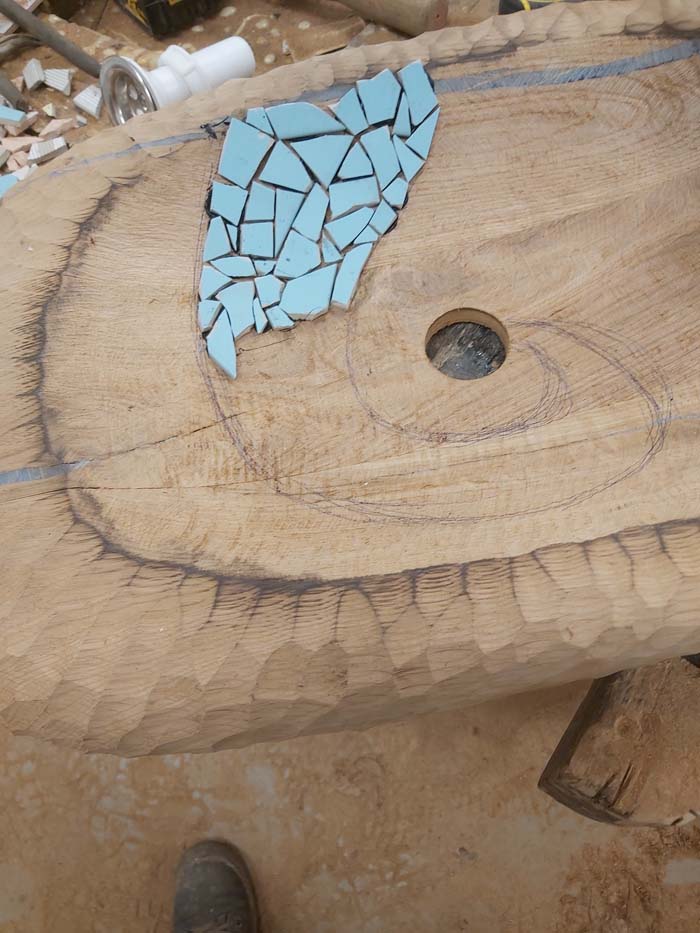
This wave design is simple but looks great.
Glue the Tiles in Place
Avoid large gaps by chipping tiles to size using a tile nipper. You can also use the tile nipper to create a rounded edge at the top of the basin.
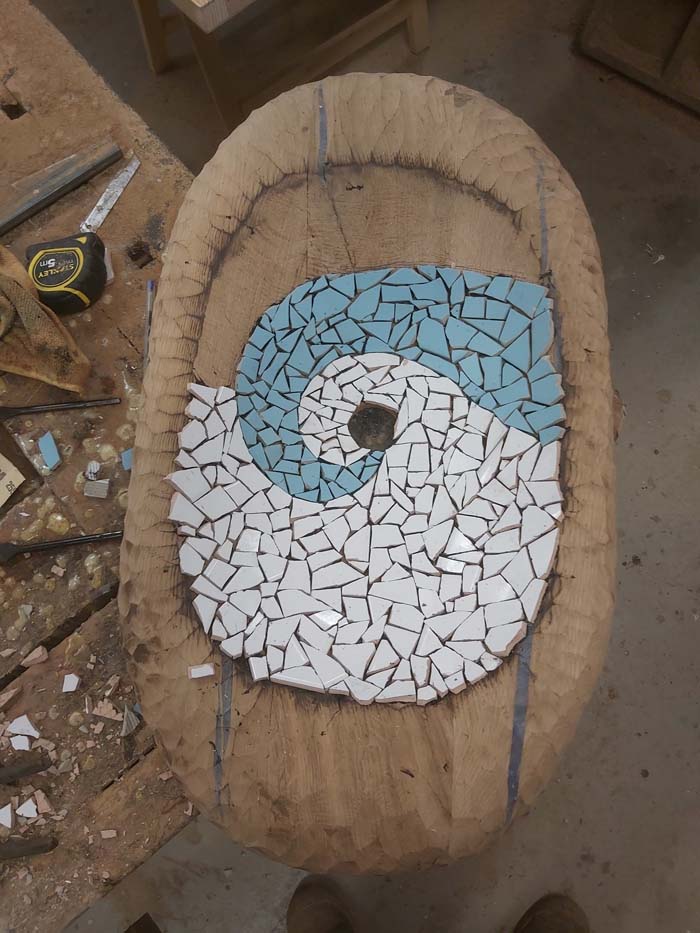
Optionally, use your angle grinder with a tile saw blade to trim the excess. We recommend using Sika Sikaflex-221 multi-purpose sealant/adhesive. This brand can be sanded.
Caulk the Tiles
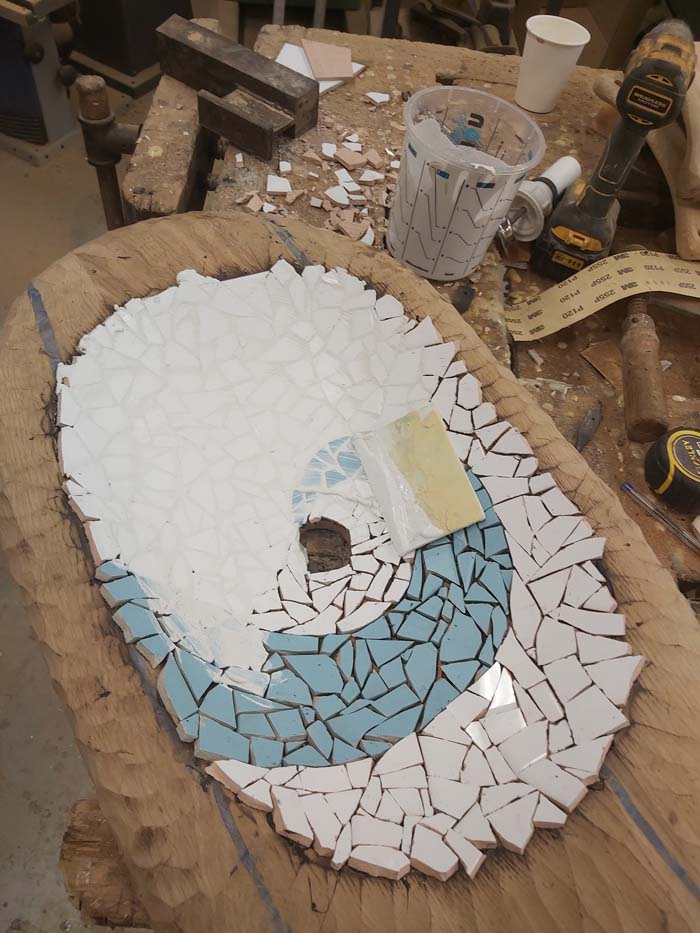
After gluing down the tiles, fill in the gaps using more adhesive. Sand over the outer edge.
Set In the Drain Body
Use the adhesive recommended by the manufacturer.
Stain and Finish With Car Lacquer
Cover the drain with painter’s tape. Staining the wood with an oil stain is optional. Spray the entire basin with two to three coats of car lacquer.
The auto shop may try to tell you that you should use furniture lacquer. Car lacquer is weatherproof while furniture lacquer is not. Car lacquer is used as the topcoat on electric guitars to get a high gloss finish.
If car lacquer is unavailable, look for marine-grade polyurethane.
Be sure and let the protective coatings cure according to the manufacturer’s instructions before installing the sink.
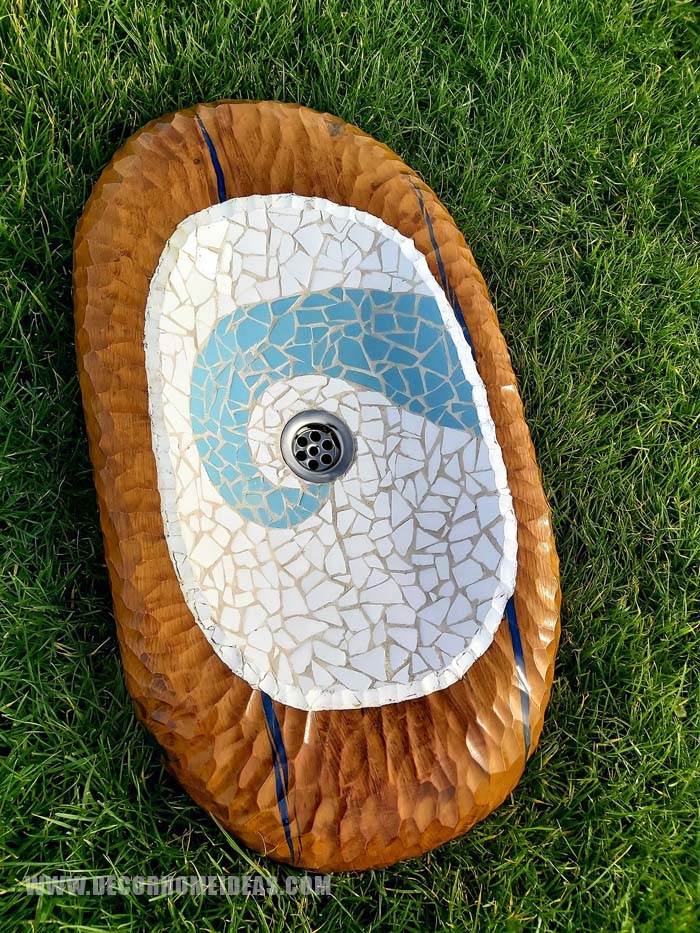
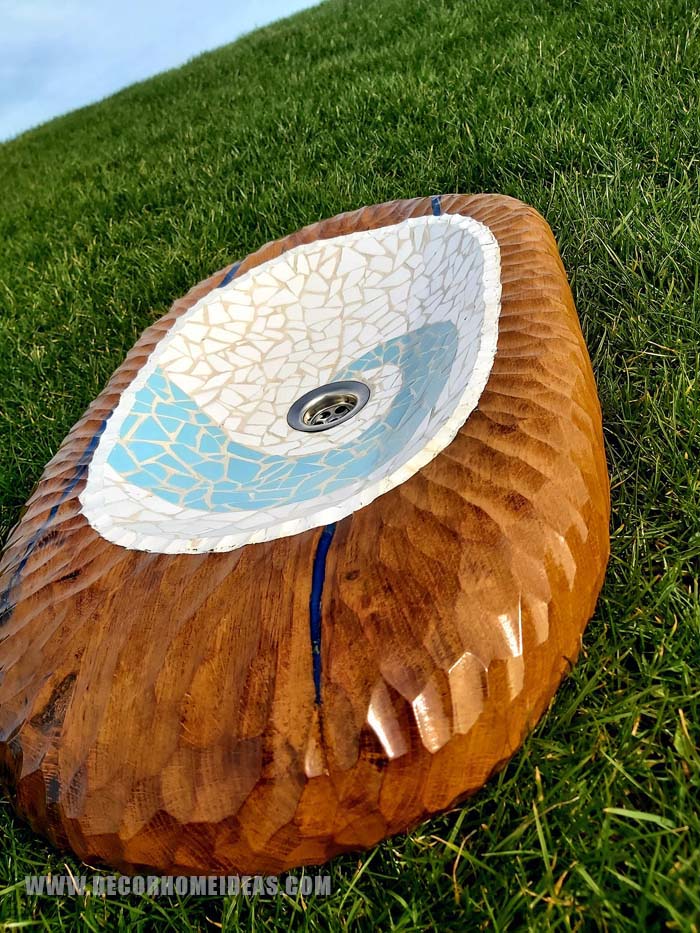
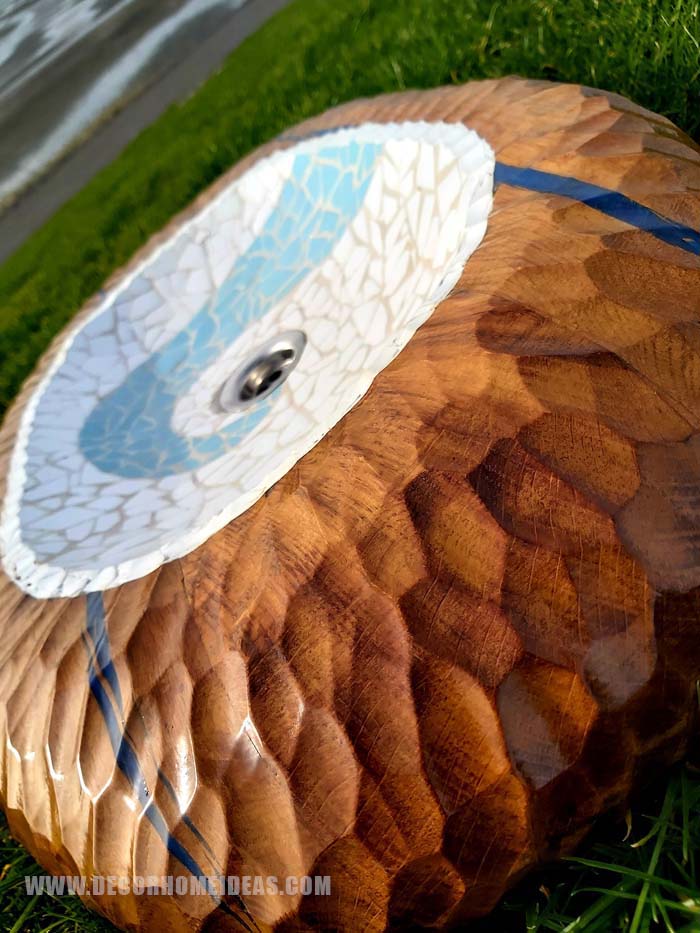
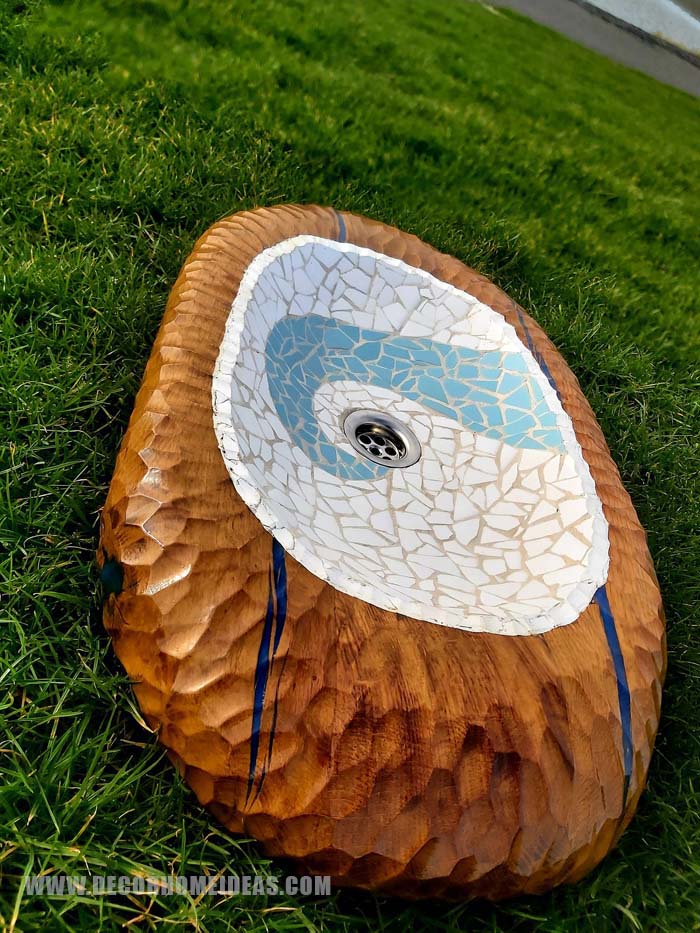
The Finished Project!
Congratulations! Your one-of-a-kind sink ready to be installed.
Details of the carvings, resin filler, and mosaic edging.
One more photo:
Thanks to Dimitar Dochev for this beautiful DIY wooden sink project.