Here’s a project that will upgrade the look of most kitchens in a weekend.
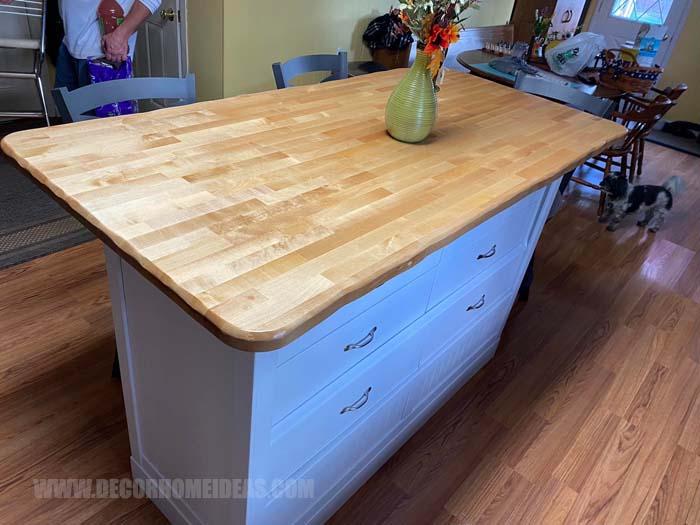
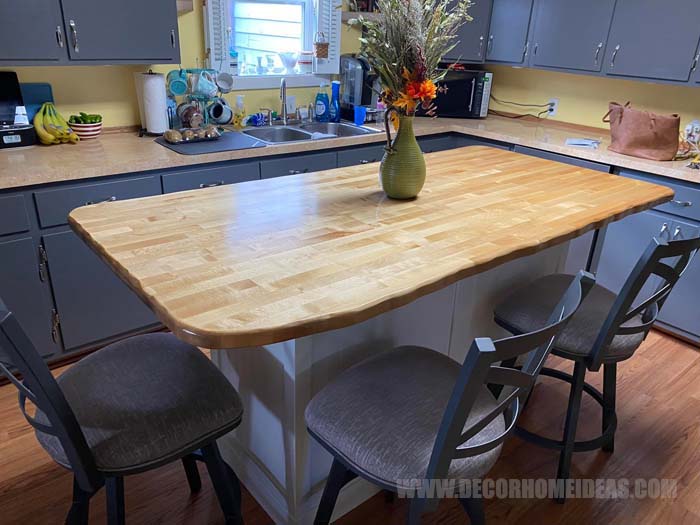
We are in love with this DIY kitchen island from a dresser. It gives you storage without building drawers and more kitchen workspace without building a butcher block board.
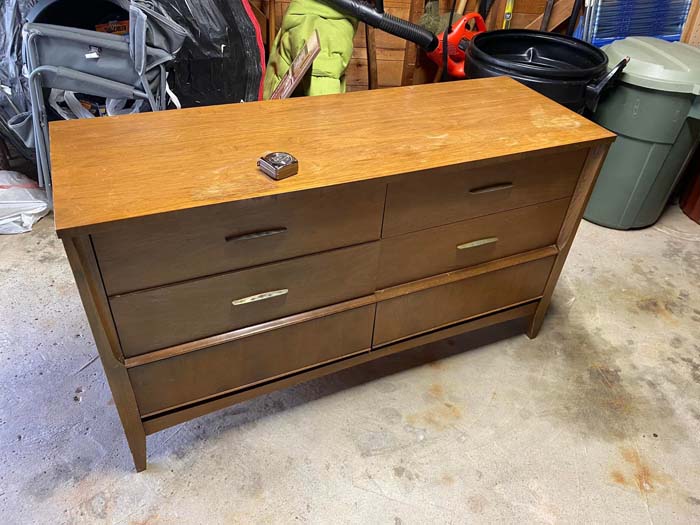
The size is more versatile than using a kitchen cabinet. You can find dressers on the side of the road, Goodwill, garage sales, or classified ads like Craigslist.
This is a beautiful way to upcycle an old dresser. This one piece of furniture gives you a seating area, more storage, and a larger workspace at the fraction of the cost of paying the retail price.
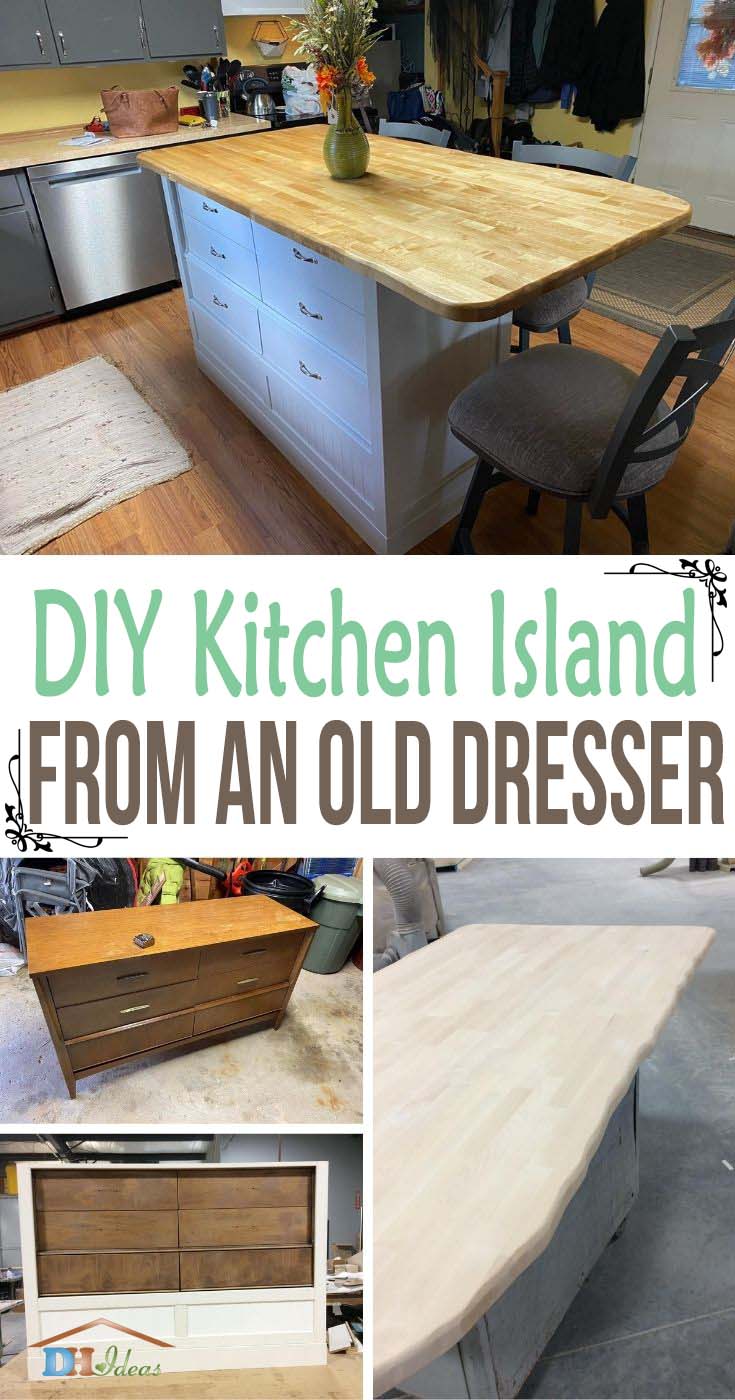
The design would work in a cottage style or country farmhouse kitchens. The best thing is that if you know the basics of woodworking, it won’t take much time at all.
You will need space for the island. The recommended space between the island and other countertops or appliances is 36 inches. Truth be told, we don’t think the original poster followed these guidelines, so you have a little room to play if you’re making this for yourself. This project is versatile enough to be a simple workstation if you just want an island without seating.
The trim is MDF, which means you can change up the pattern and paint for a style that suits your kitchen.
Measure out how much room it will take up on the floor. Tape it out and test all the doors to cabinets, appliances, and walking room.
Materials Needed
Old Dresser – Cleaned and hardware removed. A good wipe down with Kilz will clean up any oils. Scuff sand the drawers with 220 grit paper.
- Butcher Block – Birch was used here. The thickness was surface planed from 5/4 lumber. Choose a hardwood that will work well in your kitchen.
- Plywood – One each: 2 by 4 and 4 by 4 inches
- MDF Beadboard
- MDF Trim
- Food Safe Polyurethane
- Screws
- Nails
- Wood Filler
- Sandpaper – 200 to 400 grit
- Multi Surface Primer
- Paint – Oil based
- Drawer Hardware – These should match your kitchen.
The dimensions of all of the following materials will depend on the size of the dresser.
Basic Guidelines:
When it comes to a breakfast bar overhang, the standard size for this should be 18 inches to allow for enough legroom. So, if your dresser and work area are about 24 inches wide, add another 18 to 19 inches for bar stools and legroom.
The total width for two diners will be about 35.5 inches. This will accommodate bar stools. You may land a bargain by doing an online search for butcher block utility boards.
Before securing the MDF to the dresser, you’ll be attaching new legs directly to the base of the dresser. The standard height of a kitchen island breakfast bar is about 42 inches. This means the length of the legs would be 42 inches minus the height of the butcher block and dresser without feet or skirting.
This base is important as it needs to be strong enough to support the heavy countertop.
Tools
- Electric Sander (optional)
- Drill and Screwdriver
- Paint Gun (optional)
- Nail Gun and Air Compressor (optional)
- Jigsaw with a 45 degree chamfer bit
- Table Saw
Step by Step Instructions
Remove the drawers from the dresser. Cut off its legs and skirting.
Build new legs from the 4 by 4 plywood. Build the braces by cutting lengths of 2 by 4 plywood to fit in between the legs. Using a Kreg joint jig, screw together these pieces. Screw the assembled base to the bottom of the dresser.
Once the dresser is at the correct height, it’s a simple matter of building out a frame using the MDF trim. You can add skirting using MDF baseboard molding.
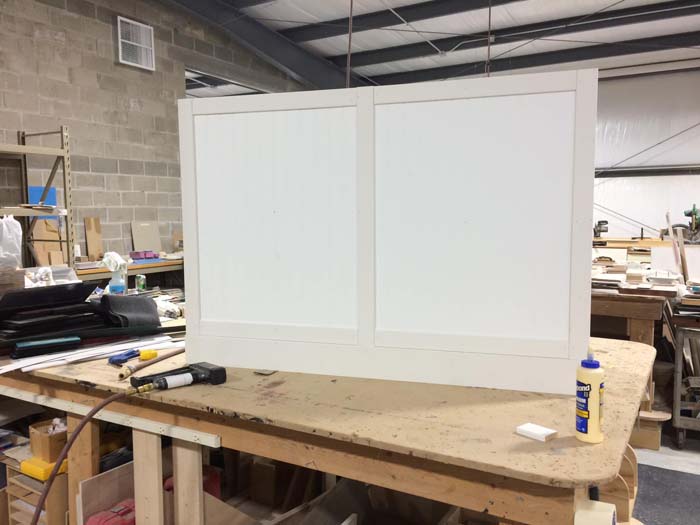
Cut the frame to size to fit the back for each opening.
Cut the trim for the sides and nail into place.
Cut the trim for the front and nail into place. Check that there’s enough clearance in the front for the drawers to open. Remove the drawers again before finishing the base.
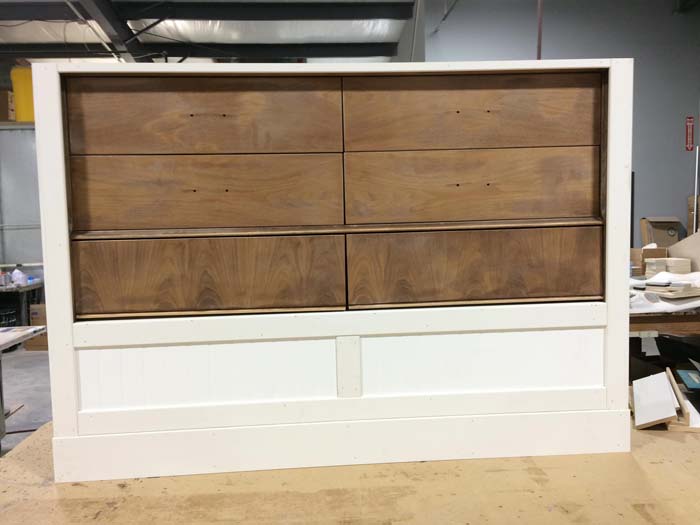
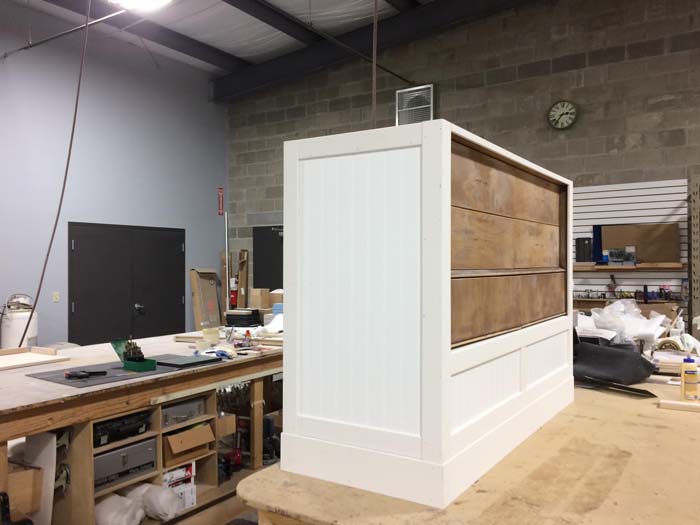
Attach the beadboard by cutting it to size and nailing it to the dresser. Optionally, you can reinforce the fit by gluing it in place with a strong adhesive.
Here is where you can get creative and attach any decorative molding. The beadboard on the back of this cabinet is actually two pieces with trim attached in the middle. The front mimics that decorative element.
Fill the nail holes and seams with putty.
Once everything has dried, sand the surfaces with 220 grit sandpaper.
Paint the MDF framing and beadboard.
Sand, wipe down and add a second coat of paint.
Paint the drawers. You can paint directly on the finished drawers if you use a multi-surface primer first. If your drawers are damaged, you should fill in any scratches with wood filler, sand with 220 grit sandpaper, and apply the multi-surface primer.
Use a jigsaw with the chamfer bit to cut a live edge on the butcher block.
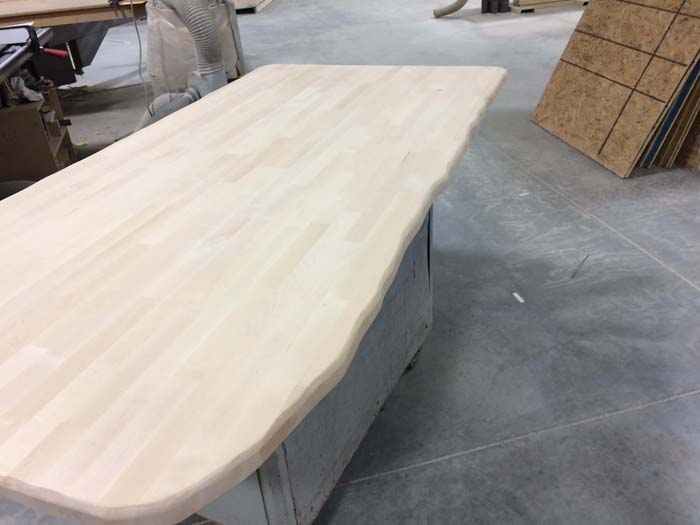
Sand down the butcher block. Start at 220 grit and work up to 400 grit. Finish it by wiping it down with a tacky cloth.
Apply food-safe polyurethane. Follow the same sanding procedure with 400 grit sandpaper. Clean and repeat as many times as necessary.
Attach the Butcher Block
Working from underneath the top of the dresser, pre-drill holes from the dresser to the butcher block.
With the drawers still removed, pre-drill holes to screw the dresser to the butcher block. Screw-in screw from inside the dresser up into the butcher block.
Attach the new hardware to the drawers and slide them into place.
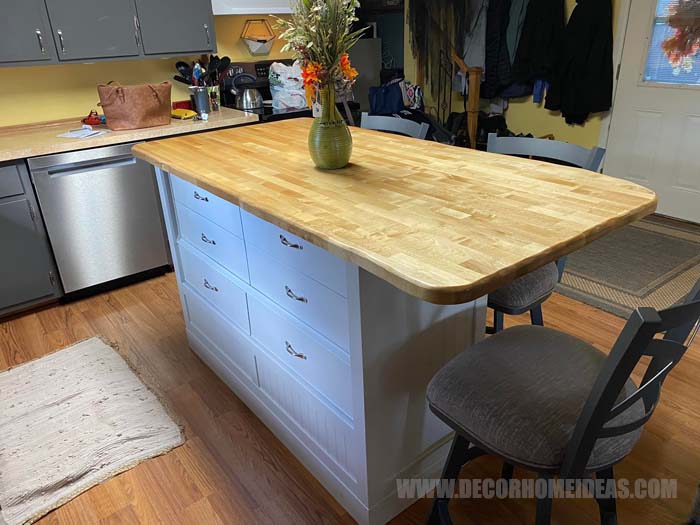
Enjoy your new butcher block kitchen island!
We would like to thank Carey Wahrer and her husband for sending us detailed info and photos of their beautiful project.